Published on : 25 December 2025
How to Pack Crockery for Moving a Break-Free Guide
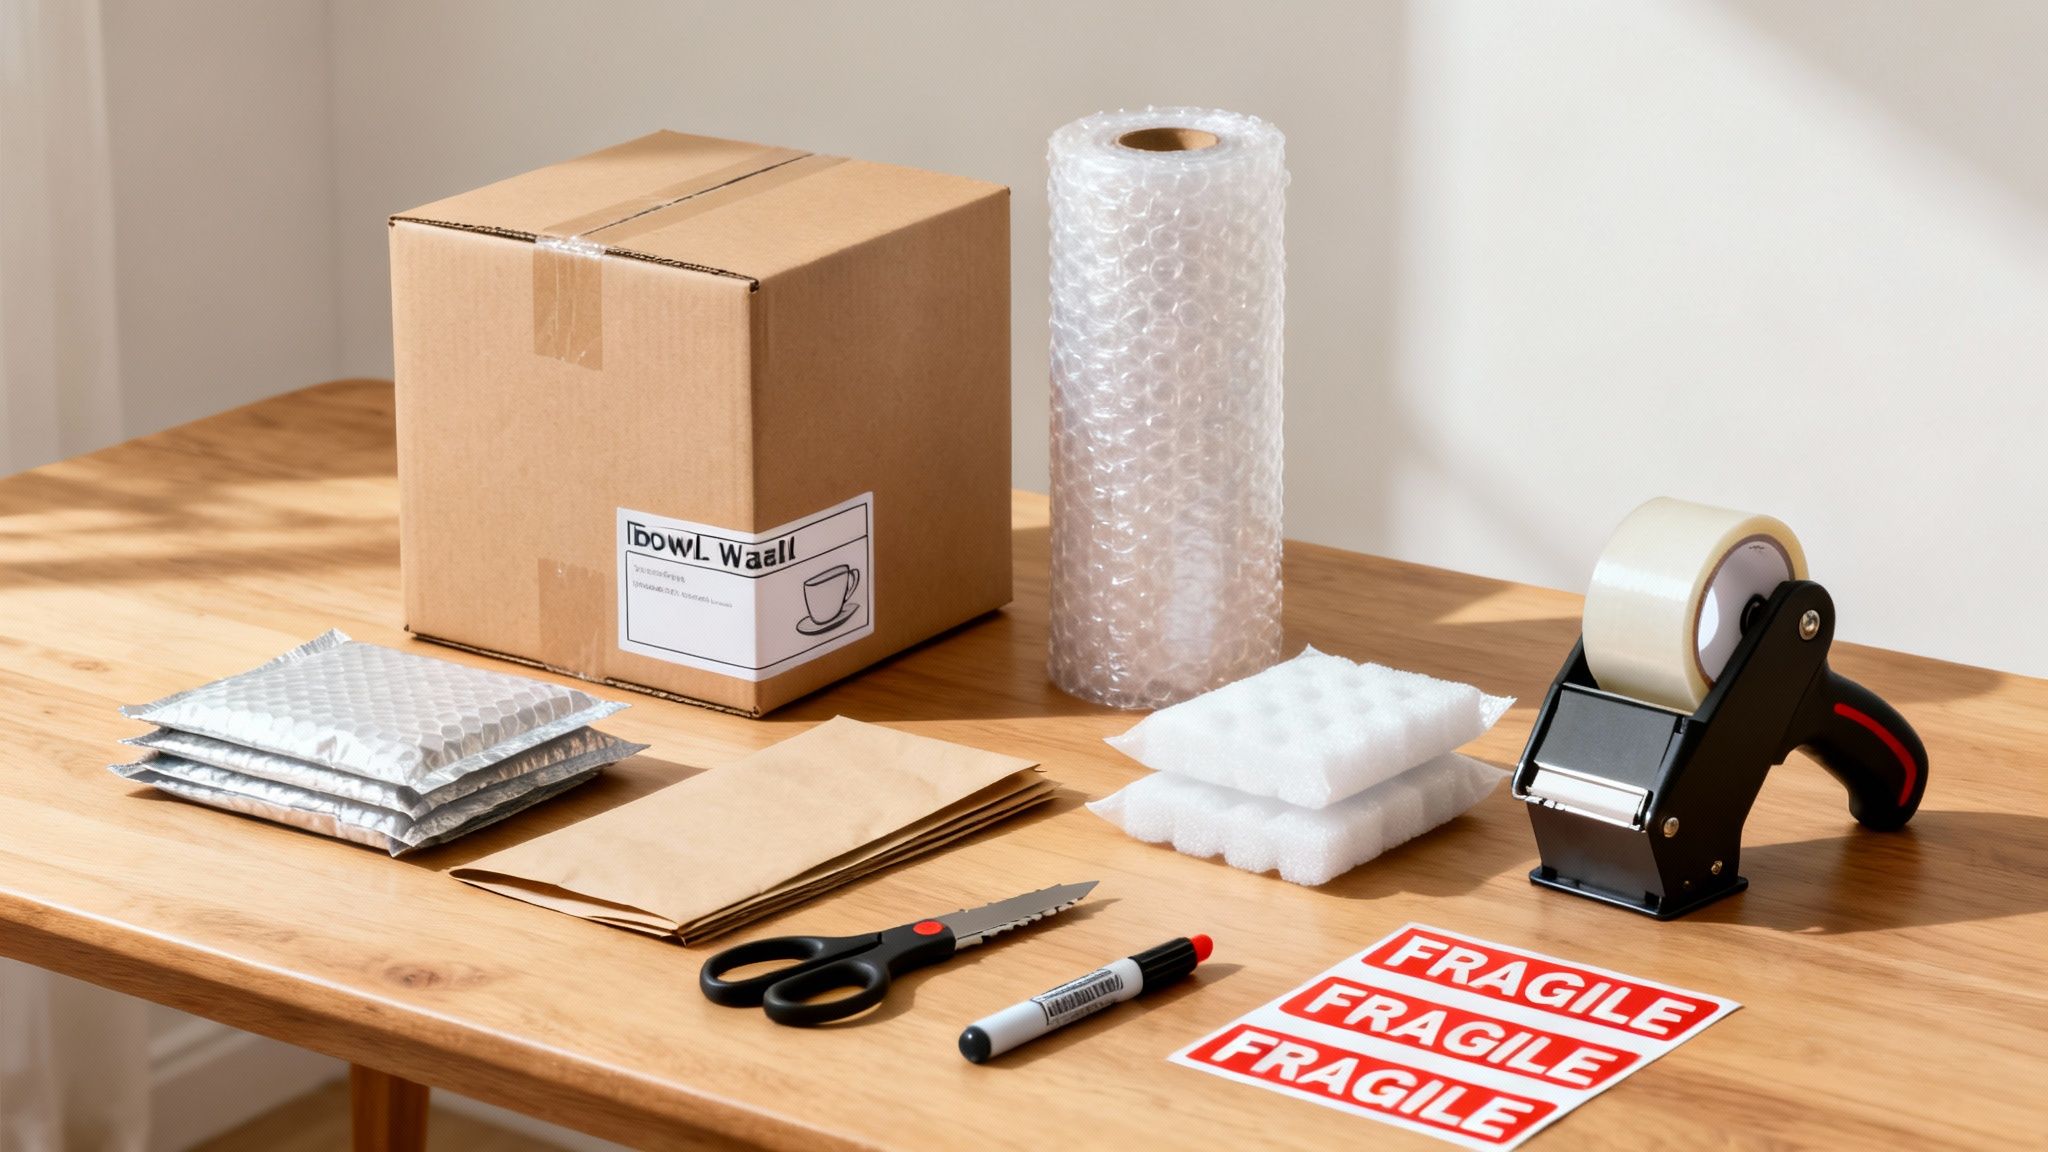
Before you even think about wrapping your first plate, let's talk about your toolkit. Getting the right packing supplies together is, without a doubt, the most important job. Trust me, using professional-grade materials like double-wall boxes and proper cushioning is the difference between opening a box of pristine dishes and a box of ceramic jigsaw puzzle pieces. Makeshift solutions just don’t have what it takes to protect your fragile items on the move.
Your Essential Packing Toolkit
The secret to a break-free move starts long before the removal lorry shows up. It begins with gathering supplies specifically designed for the job at hand. It can be tempting to save a few quid by using old towels or newspaper, but these offer minimal shock absorption and can even cause damage newspaper ink, for instance, can easily transfer onto your fine china.
Investing in a proper kit is a small price to pay for the peace of mind that your treasured dinner sets and heirlooms are secure. The right tools not only protect your belongings but also make the whole packing process quicker, smoother, and far more organised.
To make things simple, here’s a quick-reference checklist of the professional-grade materials you'll need to pack your crockery like a pro, along with a few tips from our experience.
Essential Crockery Packing Supplies
| Material | Primary Use | Pro Tip |
|---|---|---|
| Double-Wall Boxes | The main container for all crockery. | Use small or medium sizes to keep the weight manageable (under 15-20kg) and prevent crushing. |
| Packing Paper | The first protective layer for individual items. | It's ink-free, so it's perfect for wrapping directly against plates and bowls to prevent scratches. |
| Bubble Wrap | Shock absorption and extra cushioning. | Use this after an initial layer of paper. The air pockets absorb bumps and prevent items from clashing. |
| Foam Pouches | Quick, snug protection for uniform items. | A brilliant time-saver for wrapping delicate glasses or fine china plates. |
| Quality Packing Tape | Securing the boxes to prevent them from opening. | Don't skimp here. A strong adhesive tape on the top and bottom seams is crucial for heavy boxes. |
| Marker Pen | Labelling boxes clearly for safe handling. | Use a thick, permanent marker to write "FRAGILE" and "THIS WAY UP" on all sides of the box. |
| Specialised Protectors | Preventing scratches on non-stick cookware. | Consider specialised polyester pot and pan protectors for these specific items. |
Having this full arsenal ready to go means you're prepared for any packing challenge that comes your way. It makes the entire process quicker, safer, and a whole lot less stressful.
The Right Boxes Are Non-Negotiable
The foundation of secure packing is the box itself. Those standard single-wall boxes you get from the supermarket simply aren't up to the task; they crush easily under weight and can fail completely if they get a bit damp.
For anything as heavy and fragile as crockery, you must use double-wall cardboard boxes. Their dual-layer construction provides superior strength and rigidity, which is essential for protecting the contents from the inevitable bumps and vibrations of a move. Small to medium sizes are ideal, as they stop you from overloading them and creating a box that's dangerously heavy to lift.
Layers of Protection: Wrapping Materials
Just putting a plate in a box is a recipe for disaster. Every single item needs its own protective cocoon, and different materials play distinct roles in creating this shield. Packing paper is your first line of defence—it's clean, ink-free, and perfect for creating a soft buffer directly against the surface of your plates and mugs.
After wrapping in paper, bubble wrap provides the next level of security. Its air-filled pockets are brilliant at absorbing shocks and preventing items from knocking against each other. For particularly delicate pieces like fine china or crystal, foam pouches offer a snug, soft, and ready-made sleeve that saves a huge amount of time.
Expert Tip: Never, ever skimp on cushioning. The goal is to make sure no two pieces of crockery touch each other directly, and that there are no empty spaces inside the box for things to shift around.
Essential Accessories for a Professional Finish
A few smaller items are what turn a good packing job into a great one. These accessories are vital for securing your boxes properly and telling your movers exactly what's inside.
First on the list is high-quality packing tape. A weak tape can fail mid-lift, leading to a catastrophic spill. Make sure you use a strong adhesive tape to securely seal the bottom and top seams of every single box. If you’re not sure which type you need, taking a look at the different packing tapes available can help you pick one with the right strength for heavy crockery boxes.
Finally, clear communication is everything. Grab a thick marker pen and label each box so it can’t be missed. As a bare minimum, every box with crockery should be marked with:
- FRAGILE (on all sides, in big letters)
- THIS WAY UP (with arrows)
- CONTENTS (e.g., "Dinner Plates & Bowls")
- ROOM (e.g., "Kitchen")
This simple step ensures your movers handle the boxes with the care they need and put them in the right room in your new home, which makes unpacking a far less painful job.
Setting Up Your Packing Station

Before you even think about wrapping a single bowl, your best defence against chaos is to create a proper, organised packing station. A methodical setup transforms what feels like a huge task into a simple workflow. Trust me, it dramatically cuts down the risk of damage before your things even see the inside of a box. An efficient workspace is just as important as the quality of your packing materials.
Think of it like setting up your own little production line. Find a large, sturdy, flat surface with plenty of elbow room a dining table or a clear kitchen island is perfect. Try to avoid working on the floor; all that bending and reaching just increases the chances of dropping something fragile. I always lay down an old blanket or a flattened cardboard box to protect the surface and give my crockery a soft base to sit on.
Create Your Workflow Zone
Arrange all your materials in a logical order so you can get into a smooth, repeatable rhythm. Pop your stack of packing paper and bubble wrap on one side, your assembled boxes on the other, and keep your tape gun within easy reach. The whole idea is to minimise unnecessary movement. You want to be able to grab an item, wrap it, and place it in the box with a simple, fluid motion.
This prep stage is absolutely crucial. A recent survey found that 40% of people who had just moved cited disorganisation as a major source of stress. Setting up a dedicated station directly tackles this issue, turning a potentially frantic job into a calm, controlled process.
Sort and Group Your Crockery First
Right, before you start wrapping, take five minutes to sort everything. This is a step so many people skip, but it’s a total game-changer for both speed and safety. Group all your crockery by size, shape, and weight.
- Dinner Plates: Make one stack of all your large dinner plates.
- Side Plates: Group all the smaller salad or side plates together.
- Bowls: Nest any bowls of the same size into manageable stacks.
- Mugs and Cups: Gather up all your mugs, teacups, and their saucers.
Sorting like this lets you get into a real rhythm. You can wrap all ten dinner plates using the exact same technique without having to constantly switch gears for a different-sized item. It also helps you see at a glance how many boxes you'll need for each category and ensures you pack items of a similar weight together, which is vital for a stable, well-balanced box.
A Pro Mover's Insight: "We never just grab and wrap. We sort everything first—plates with plates, bowls with bowls. It lets us pack faster and, more importantly, safer. A box packed with uniformly sized items is a stronger, more stable box."
Ensure Everything Is Clean and Dry
Finally, and this is the most critical prep step of all, make sure every single piece of crockery is perfectly clean and completely bone dry. Packing even slightly damp items is a recipe for disaster, especially if they’re going into storage for any length of time.
Trapped moisture can quickly lead to mould and mildew, which can permanently stain or even damage your dishes. It also weakens cardboard boxes from the inside out, completely compromising their strength. Give everything a final wipe with a dry cloth, paying close attention to the rims of bowls and the bases of mugs where water loves to pool. This simple check protects both your crockery and the boxes they travel in, ensuring everything arrives at your new home in pristine condition.
Right, you’ve got your packing station set up and your crockery is sorted into neat piles. Now for the most important part: the wrapping. This is where the magic happens, transforming a clatter of fragile items into a secure, cushioned unit ready for the road.
This isn’t just about stopping a few scratches. Tossing things into a box with a bit of newspaper is a recipe for disaster. A methodical, multi-layered approach is the only way to shield your kitchenware from the inevitable bumps and vibrations of a moving lorry. And it's worth getting right—the kitchen and tableware sector in the UK is a huge market, predicted to grow by £444 million between 2024 and 2029. That means the average household is packing dozens of items with a replacement value easily in the hundreds of pounds. Even a small number of breakages adds up.
The Foundation: The Paper Wrap
Your first line of defence is clean packing paper. Unlike newspaper, it’s ink-free, which means you won't spend the first day in your new home scrubbing newsprint off your best china. The aim here is simple: total coverage.
Lay a couple of sheets of paper on your work surface. Place a plate in the centre, pull one corner of the paper over the top and tuck it underneath. Then, bring the next corner over, followed by the others, until the plate is completely encased. You shouldn't be able to feel any part of the plate through the paper. For an extra layer of protection, you can even place a second plate on top of the first wrapped one and repeat the process, bundling them together.
Tackling Plates and Bowls
Plates might seem straightforward, but their flat, broad surfaces make them surprisingly vulnerable. The secret is to give them individual attention before bundling them securely.
- Wrap Individually: Start by wrapping each plate in at least two sheets of packing paper, using that tuck-and-fold method we just covered.
- Create Small Bundles: Once you have three or four individually wrapped plates, stack them up.
- Bundle Wrap: Now, take that entire stack and wrap it again with several more sheets of packing paper. This creates a tight, secure bundle that stops the plates from shifting and grinding against each other.
Bowls need a slightly different approach to protect their curved edges. The best method is to stuff the inside first to give them some internal support.
- Crumple up a sheet of packing paper and pop it inside the bowl.
- Place the bowl on a stack of paper and wrap it, tucking the paper around the sides as you go.
- Just like with plates, you can then stack three or four wrapped bowls and give them a final bundle wrap.
Crucial Takeaway: The whole point of bundling is to create a single, solid unit from several individual items. This unit is far stronger and less likely to shift inside the box than a load of loose, individually wrapped items.
Securing Mugs and Cups
Mugs and cups can be a bit awkward, mainly because of their handles, which are often the most fragile part. You need to give them special attention.
Start by wrapping the handle first. Take a half-sheet of packing paper and wrap it tightly around the handle several times to create a padded buffer. Then, crumple another sheet and gently stuff it inside the mug for internal support. Finally, place the mug on a full sheet of paper and roll it up, tucking in the sides as you go, just like wrapping a gift.
The Bubble Wrap Finishing Layer
Once an item or bundle is securely wrapped in paper, it's time for the ultimate shock absorber: bubble wrap. This layer isn't for preventing scratches—the paper has already handled that. This is all about creating an air-cushioned barrier that can withstand some serious impacts.
For bundles of plates or bowls, a single, generous wrap-around with bubble wrap is perfect. Secure it with a small piece of packing tape. For oddly shaped things like a teapot, pay extra attention to the spout and handle, making sure they’re well-padded with an extra layer. Exploring the different types of bubble wrap available from The Box Warehouse can help you pick the right grade for your most precious items.
Dealing with Awkward Shapes
Of course, not everything in your kitchen is a neat circle. Serving platters, gravy boats, and teapots all require a bit of creative problem-solving.
- Serving Platters: Treat these like massive dinner plates. Wrap them generously in paper, then give them a full layer of bubble wrap. Because of their size, it's best to pack them vertically in the box on their own, rather than bundling them.
- Teapots and Coffee Pots: These are probably the most challenging. Wrap the lid separately from the pot itself. Stuff the inside of the pot with crumpled paper. Pad the spout and handle with extra paper or a small piece of bubble wrap before wrapping the entire item. Place the wrapped lid upside down in its opening before the final wrap.
- Gravy Boats: Similar to teapots, pay close attention to the handle and spout. Wrap these delicate parts first before encasing the entire boat in paper and then bubble wrap.
By mastering these individual wrapping techniques, you transform a box of fragile, clattering items into a secure, cushioned, and road-ready package. Each layer you add serves a specific purpose, contributing to a system that gives your crockery the best possible chance of arriving completely intact. This careful preparation is the most important part of learning how to pack crockery for moving.
Loading Boxes For Maximum Protection
How you load your boxes is just as critical as how carefully you've wrapped everything inside. I've seen it happen: a perfectly cushioned plate can still end up in pieces if it's rattling around in a badly packed box. Think of this stage as building a small, secure fortress for your crockery, designed to withstand the inevitable jolts and bumps of the journey.
Your very first move is to create a soft landing pad. Before a single piece of crockery goes in, scrunch up several sheets of packing paper and lay down a generous base layer, at least 5-6 cm thick. This initial cushion is your first line of defence against shock, protecting everything from impacts from below.
The infographic below gives you a quick visual on the simple but effective process.
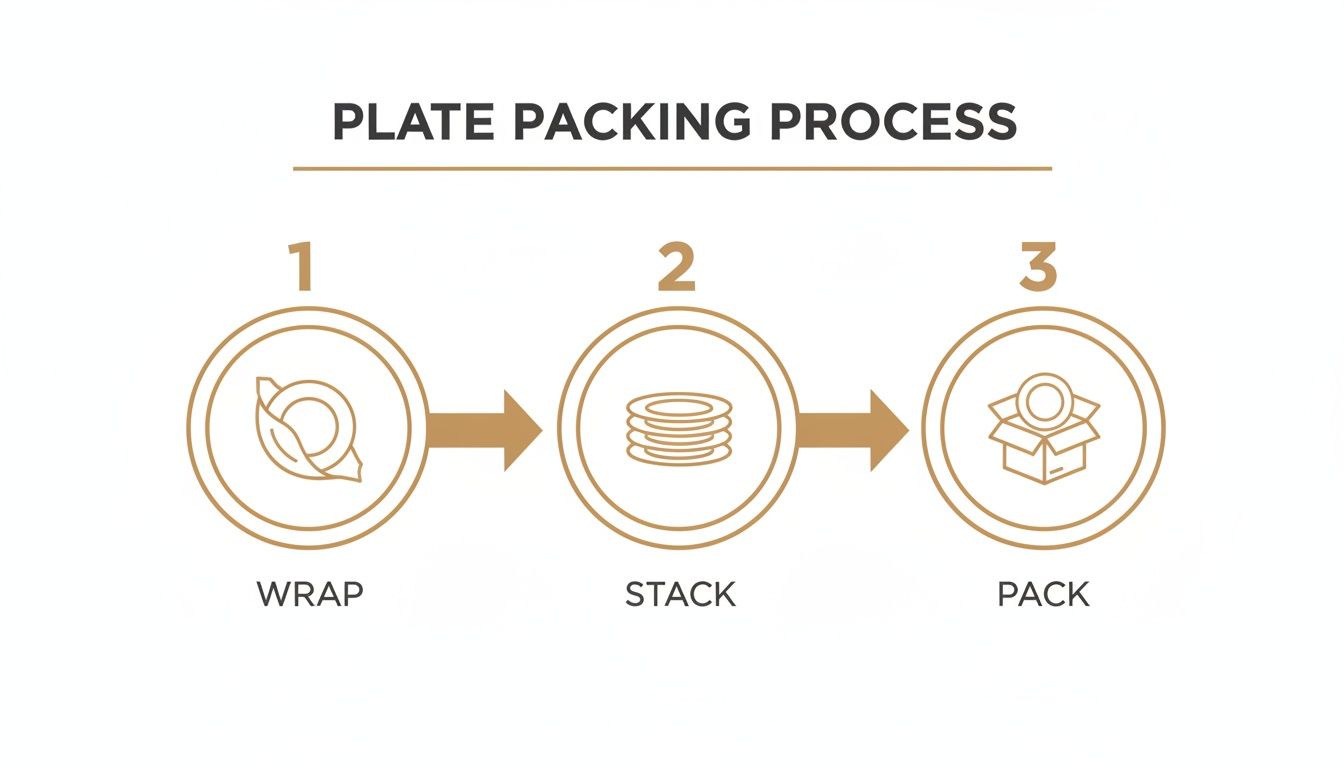
It really reinforces that 'wrap, stack, and pack' is a methodical approach to keeping every piece safe. Each step builds on the last to create a solid, stable unit inside the box.
The Vertical Packing Method For Plates
Here’s one of the most important secrets professional movers use for fragile items: always pack plates vertically on their edges. It might feel completely wrong, but stacking them flat is a recipe for disaster. When plates are stacked horizontally, the entire weight of the pile presses down on the one at the bottom, making it incredibly vulnerable to the slightest knock.
Think of it like storing records in a crate. You just slide each wrapped plate or bundle of plates into the box on its side. This simple change in direction transfers any vertical impact force through the strongest part of the plate—its edge. Trust me, this method dramatically reduces the risk of fractures and cracks in transit.
Strategic Layering For Stability
Once you've got the vertical plate technique down, the next principle is layering. The rule is simple and absolutely non-negotiable: heaviest items must always go at the bottom.
Start with your vertically packed dinner plates or heavier serving platters. Once that first layer is in, you can add a corrugated divider or another thick layer of crumpled paper on top. Then, you can start on your next layer of lighter items, like smaller side plates or bowls. The lightest and most delicate things, like teacups or mugs, should always form the final, top layer.
This heavy-to-light structure creates a low centre of gravity, making the box far more stable and much less likely to tip over.
Eliminating All Empty Space
A half-empty box is a dangerous box. Any void inside allows your carefully wrapped items to shift, slide, and smash into each other with every turn and bump in the road. This internal movement is one of the most common causes of breakages. Your mission is to fill every single gap.
Use crumpled packing paper, bubble wrap, or even soft tea towels to stuff into any open spaces. Check the corners, the sides, and the gaps between different bundles.
Crucial Takeaway: When you think you're done, give the box a gentle shake. If you can feel or hear anything moving inside, you need more padding. The goal is for the contents to be so snug that nothing can shift an inch.
Just as furniture covers offer a layer of defence against daily wear, it's crucial to implement effective protective measures for your belongings during a move. Filling every void in your boxes acts as that essential protective shield against internal collisions.
Respecting Safe Weight Limits
It's tempting to cram as much as possible into a single box to save a bit of time, but this is a serious mistake. An overloaded box isn't just a risk to your back; it’s a risk to its own structural integrity. The cardboard can buckle, and the bottom seams can fail spectacularly.
Professional packers aim for boxes of 15–20 kg maximum to keep manual handling safe. A standard dish pack, like the sturdy double-wall boxes we recommend, will typically hold around 8–12 dinner plates once they're individually wrapped. Keeping the box weight under 20 kg usually means placing no more than that many heavy ceramic plates inside.
Sealing For Maximum Structural Strength
Once the box is perfectly packed and filled, the final step is sealing it correctly to maximise its strength. Don't just run a single strip of tape across the middle seam. For heavy boxes filled with crockery, the 'H-tape' method is the professional standard.
- Seal the Centre Seam: Apply a strip of strong packing tape along the main seam where the top flaps meet.
- Seal the Side Seams: Apply two more strips of tape across the shorter side seams.
This H-shaped seal reinforces the box's structure, preventing the flaps from opening under pressure and adding a significant amount of rigidity.
Finish by adding one last layer of cushioning paper on top of the contents before you seal it all up. This ensures that even if another box is stacked on top, the pressure isn't transferred directly onto your fragile items. Your box is now a secure, stable, and correctly loaded fortress.
Time for the Finishing Touches: Labelling and Handling
All your careful wrapping and clever box-loading can be undone in a heartbeat without this final, critical step: clear communication. Proper labelling isn’t just a nice-to-have; it’s the instruction manual for your movers and, just as importantly, your future self. It’s a simple act that makes sure the care you’ve taken so far follows the box all the way through handling, transport, and unpacking.
Think of each box as a silent communicator. A well-labelled box instantly tells anyone who touches it three vital things: its contents are fragile, which way it needs to stay, and where it belongs in your new home. Without this, it's just another brown box, at risk of being shoved upside down or buried under a pile of heavy books. Your hard work deserves a better fate than that.
Creating a Clear Communication System
You don't need a complex coding system here; clarity and visibility are your only goals. Grab a thick, dark, permanent marker and write directly onto the cardboard on at least three sides of every box—the top and two opposite sides. This makes sure the information is visible even when the boxes are stacked.
Here’s the essential information to include on every single box containing crockery:
- FRAGILE: This should be the biggest, boldest word on the box. Write it in massive capital letters so it can’t possibly be missed.
- THIS WAY UP: Use arrows pointing upwards on all visible sides to make the correct orientation immediately obvious. This is non-negotiable for boxes packed with vertically stacked plates.
- DESTINATION ROOM: Clearly write "KITCHEN." This simple instruction saves a huge amount of time and effort on moving day, stopping your plate boxes from ending up in the master bedroom.
- CONTENTS SUMMARY: A brief, specific description like "Dinner Plates & Bowls" or "Mugs & Glassware" is incredibly helpful. It helps you prioritise unpacking and find that essential coffee mug on your first morning.
For an even clearer and more professional approach, pre-printed labels are a brilliant shortcut. Using bright, unmistakable stickers ensures your instructions won't be missed. You can find high-visibility fragile labels on a roll that make this part of the job quick and seriously effective.
A Mover's Perspective: "Clear labels are the best thing a customer can do for us. When we see 'FRAGILE' and 'KITCHEN' in big letters, we know exactly how to handle that box and where it goes. It makes the whole process faster and, more importantly, safer for the contents."
Safe Handling and Loading on Moving Day
Your job isn't quite finished once the boxes are sealed and labelled. On moving day, you become the project manager, overseeing the final leg of the journey. Make a point of communicating directly with your removal team and show them the stack of crockery boxes. A quick chat ensures everyone is aware of the high-value, fragile items.
When it comes to loading the lorry, fragile boxes should always be loaded last.
This simple strategy means they’ll be the first to be unloaded at your new home, and it stops them from being crushed under the weight of furniture or heavier boxes during the journey.
They need to be placed in a secure, stable position inside the vehicle, preferably on a flat surface where they won't slide or topple over. Ideally, they shouldn't have other heavy items stacked directly on top of them. Following these final handling steps is the last piece of the puzzle to moving your crockery without a single breakage.
Common Crockery Packing Questions Answered
Even with the best packing guide in hand, a few tricky questions always crop up when you’re staring at a pile of plates and a roll of bubble wrap. It’s totally normal. To help you tackle those last-minute dilemmas with confidence, we’ve answered some of the most common queries people have. Think of this as your go-to reference for those final packing puzzles.
Can I Use Newspaper Instead of Packing Paper?
It’s always tempting to use old newspapers to save a bit of cash, but I’d strongly advise against it for anything you eat or drink from. The ink transfers incredibly easily and can leave stubborn, grimy stains on your dishes, especially on more porous ceramics like stoneware.
More importantly, newspaper is thin and offers very little real cushioning against the inevitable knocks and bumps of a move. For proper protection, always use clean, ink-free packing paper as your first line of defence. It’s a small investment for a lot of peace of mind.
What Are the Best Boxes for Plates and Bowls?
The type of box you choose is non-negotiable for fragile items. You absolutely must use double-wall cardboard boxes. They are significantly stronger and far more resistant to crushing than the standard single-wall boxes you might find at a supermarket.
Smaller, sturdy boxes, often called 'book boxes', are perfect for crockery. Their compact size naturally stops you from overloading them, which helps you keep the total weight under the recommended 15-20kg for safe and easy handling. This ensures the box keeps its shape and protects what's inside.
Expert Insight: A box's strength is seriously compromised if it's overloaded. Keeping the weight manageable not only protects your back but also protects your precious cargo by preventing the box from buckling under pressure.
Should Plates Be Packed Flat or on Their Side?
This is one of the most critical rules in packing, and it's one people often get wrong: always pack plates vertically on their side, never flat. I know it feels counterintuitive, but the physics are simple. When plates are stacked flat, a single jolt from the removal lorry puts immense pressure on the entire stack, making a break almost inevitable.
When you pack them vertically, like records in a crate, the force is distributed across the strongest part of the plate—its edge. This dramatically reduces the risk of cracks and shatters. Honestly, this single technique is one of the most effective ways to ensure your dinner service arrives in one piece.
For more answers to common queries, our comprehensive frequently asked questions page has additional insights on all things packing.


