Published on : 24 December 2025
How to Pack Shoes for Moving A Practical Guide
Before a single shoe goes into a box, a bit of prep work can make a world of difference. Getting your shoes ready for the move isn't just about packing; it’s about making smart decisions now that will save you time, space, and hassle later on. This initial stage sets you up for a much smoother, more organised move.
Setting Your Shoes Up for a Successful Move
This is your chance to sort, clean, and protect your collection, ensuring everything arrives at your new home in top condition and ready to wear. A little effort here goes a very long way.
Declutter and Lighten Your Load
Let's be honest, moving is the perfect excuse for a proper clear-out. Go through your entire shoe collection and be ruthless. The classic one-year rule is a great place to start: if you haven't worn a pair in the last 12 months, it's probably time to say goodbye. This isn’t just about making space; it’s about reducing the number of boxes you have to buy, pack, and lug to the new house.
For the pairs that don't make the cut, you've got a few options:
- Donate: Charity shops are always grateful for good-quality, wearable shoes.
- Sell: Online marketplaces are brilliant for selling nearly-new or high-value pairs.
- Recycle: For any footwear that's truly past its best, look for local textile recycling points.
It’s the same logic you’d apply when learning how to organize your shoes in a closet – starting with a good declutter makes everything that follows ten times easier.
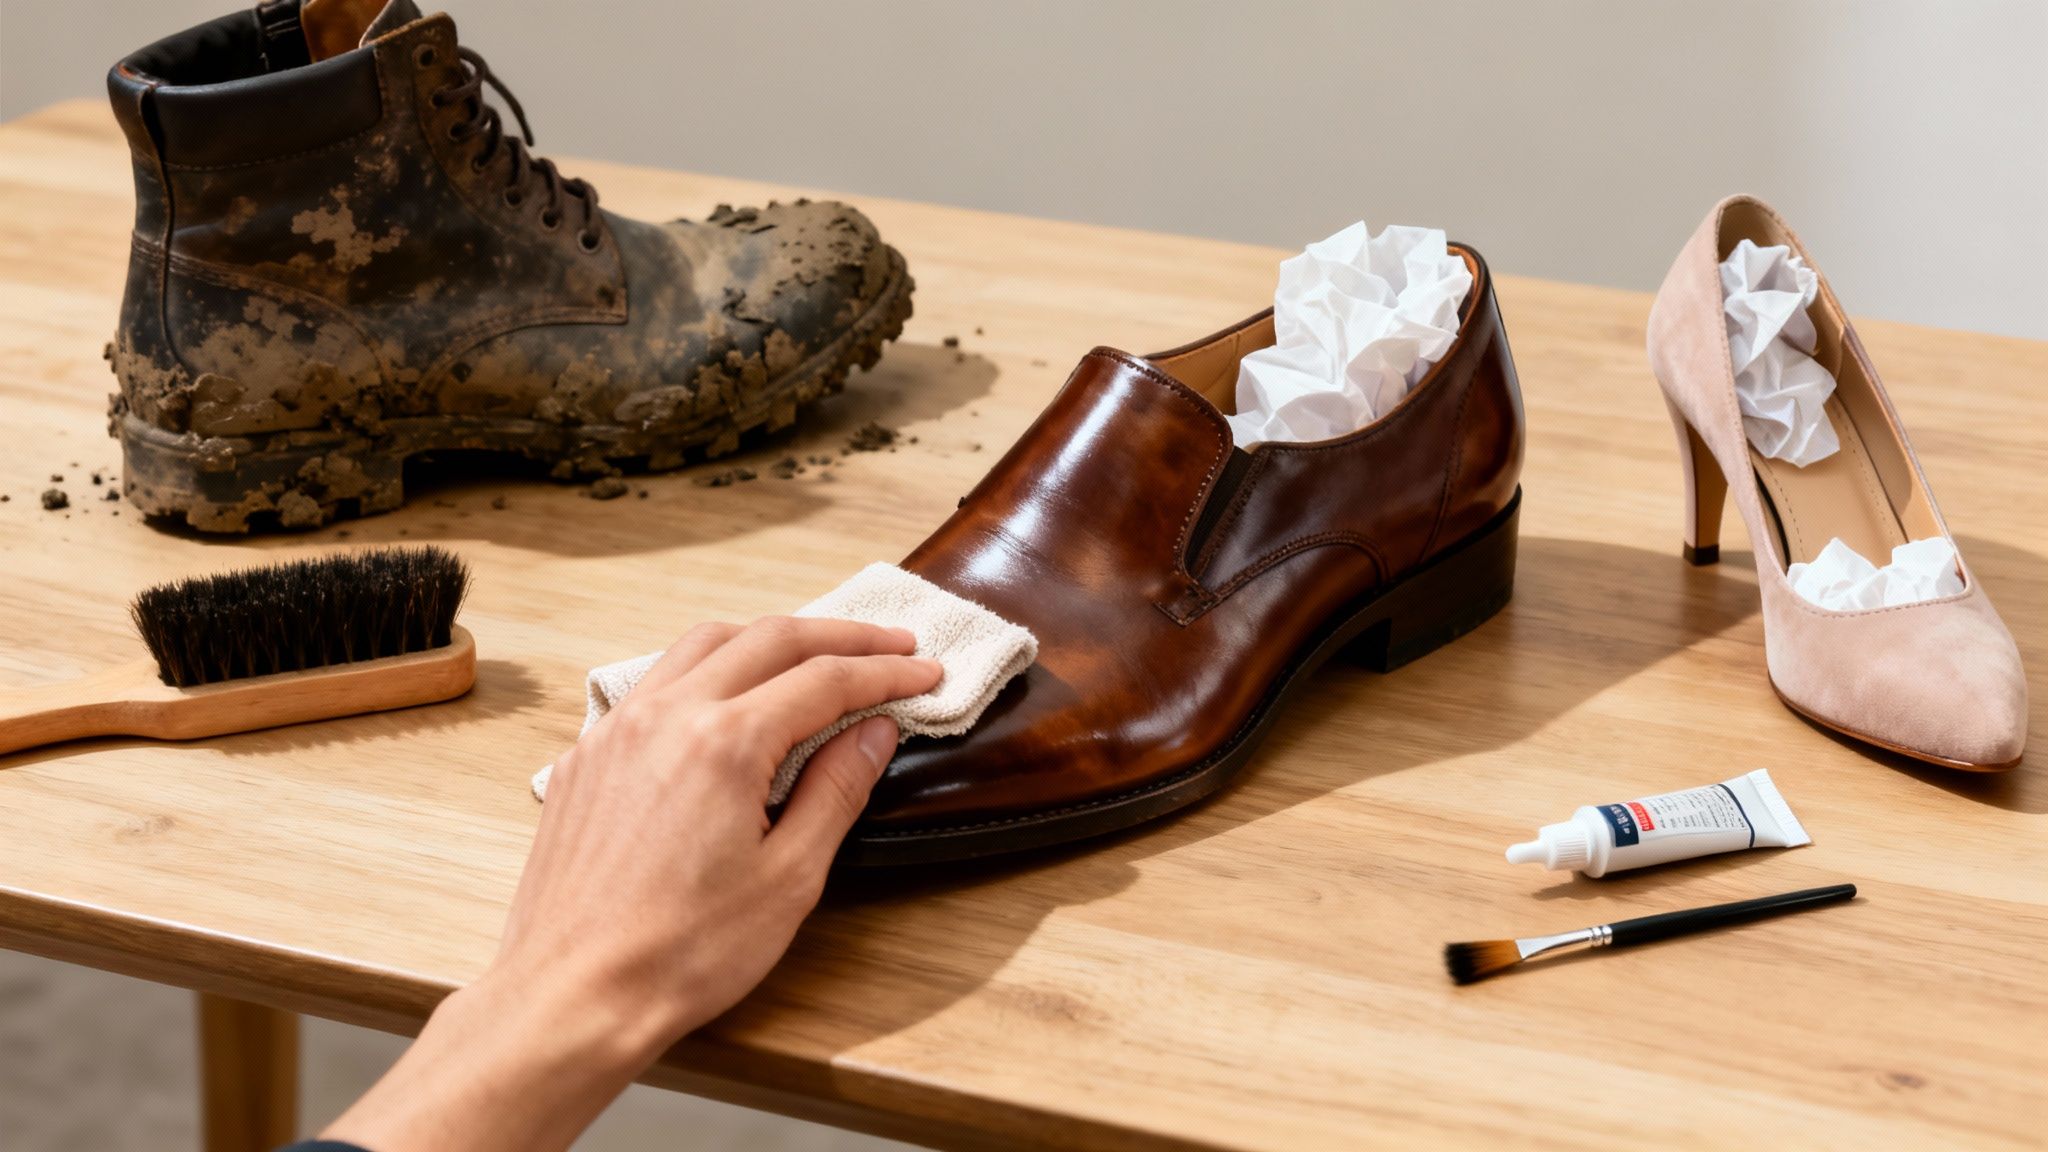
Clean and Condition Every Pair
Packing dirty, muddy shoes is a definite no-no. It’s a fast track to creating nasty smells, transferring dirt onto other items, and even encouraging mould if they’re going to be stored for a while.
Take a bit of time to clean each pair properly based on its material. Wipe down leather, give suede a good brush, and scrub the soles of your trainers. The most important step? Make sure every single shoe is completely dry before it goes anywhere near a packing box. This is crucial for arriving with fresh, clean footwear.
If you're in the middle of a full house move, you can find all the packing supplies you need in handy home moving kits to make life a bit easier.
Make Minor Repairs Now
We’ve all got them – that pair with a loose heel cap, a scuffed toe, or a sole that’s just starting to peel. Now is the perfect time to fix them. Ticking off these small repairs before you pack means your shoes are good to go the moment you unpack them.
Tackling minor issues beforehand prevents them from worsening during transit. A small scuff is much easier to polish out now than a deep gouge that happens when an unprotected shoe rubs against something in a moving box. It’s a simple act of preventative care for your footwear.
Choosing the Right Supplies to Protect Your Footwear
Tossing your shoes into old supermarket bags or flimsy boxes is a sure-fire way to end up with scuffed heels and crushed trainers. To do the job properly, you need the right tools. Investing in a few key supplies is the difference between your footwear arriving in perfect condition and discovering a heartbreaking mess when you unpack.
Getting your materials ready before you start avoids that last-minute stress and makes sure every pair gets the cushioning it needs for the journey ahead. Let's look at the non-negotiables.
Before you wrap a single shoe, it's worth getting your toolkit in order. Having the right supplies on hand means you can get into a good rhythm without stopping to hunt for more paper or tape.
Here’s a quick-reference table to help you gather the essentials that will keep your shoes safe and sound.
Essential Shoe Packing Supplies
| Material | Primary Use | Insider Tip |
|---|---|---|
| Double-Walled Boxes | Providing a strong, crush-proof outer shell for your shoes. | Opt for small or medium sizes. This stops them from becoming too heavy to lift and protects the shoes at the bottom from being squashed. |
| Packing Paper | Wrapping individual shoes to prevent scuffs and scratches. | Far better than newspaper, which can easily transfer ink onto light-coloured suede or canvas trainers. |
| Bubble Wrap | Protecting delicate heels, buckles, or embellishments. | A single layer is usually all you need. It provides excellent cushioning against bumps and knocks in the van. |
| Clean Socks | Stuffing inside shoes to help them keep their shape. | A brilliant multi-purpose tool. Perfect for maintaining the form of leather boots, formal shoes, and even trainers. |
| Acid-Free Tissue | Wrapping high-value leather, suede, or delicate fabrics. | An absolute must for long-term storage or for protecting your most expensive pairs from chemical damage. |
This simple checklist covers everything you need to pack your shoe collection like a pro, ensuring everything arrives at your new home looking just as good as when it left.
Why Acid-Free Paper Is a Non-Negotiable
When it comes to looking after delicate fabrics and expensive leather, you quickly learn that not all paper is created equal. Standard packing paper and, even worse, newspaper, contain acidic compounds. Over time, these acids can cause yellowing and slowly break down the fibres of your shoes, causing permanent damage to your favourite pairs.
The single most important material for protecting high-value leather, suede, or anything you're putting into long-term storage is acid-free tissue paper. Standard paper contains acids that will cause discolouration and material damage over time.
Using a quality wrapping material is a small investment that offers serious protection. This simple swap shields your shoes from chemical damage, making sure they look as good coming out of the box as they did going in. You can learn more about the benefits of using specialist acid-free tissue paper for all your delicate items, but trust me, it’s a professional-grade secret for a stress-free move.
Packing Techniques for Every Type of Shoe
Let’s be honest, not all shoes are created equal, and they definitely shouldn’t be packed that way. A sturdy pair of hiking boots can handle a bit of rough and tumble, but your delicate stilettos require a much gentler touch. Learning how to pack shoes properly means tailoring your technique to each style.
This approach makes sure everything from your everyday trainers to your smartest formal shoes arrives without a single scuff, dent, or crease. It’s all about giving each pair the individual care it deserves.
This simple workflow shows the essential items you'll need for packing any type of shoe effectively.

As you can see, the process highlights that a strong box, protective wrapping paper, and supportive stuffing are the three core pillars of successful shoe packing.
Handling Casual Shoes, Trainers, and Flats
For your everyday footwear like trainers, pumps, and sandals, the main goals are saving space and preventing scuffs. These pairs are generally quite robust, so you can pack them more densely without much risk of damage.
A popular and highly effective method is the sole-to-sole technique. Place one shoe on its side, then place its partner directly on top with the soles touching. This simple trick protects the fabric or leather uppers from any dirt and grit on the soles.
Once they're paired up, you can wrap them together in a single sheet of packing paper before placing them neatly in the box.
Protecting Delicate Heels and Formal Shoes
This is where a bit of extra care really pays off. High heels, expensive dress shoes, and anything with delicate embellishments are particularly vulnerable to damage during a move. The key here is to support their structure and shield them from any impacts.
Start by stuffing the toe area and body of each shoe firmly with clean socks or crumpled, acid-free paper. This is absolutely essential to prevent them from getting crushed and losing their shape in transit.
Next, you need to wrap each shoe individually. Don't be tempted to bundle them together, as a sharp heel can easily puncture or dent the material of the other shoe. Use a generous amount of packing paper or even a layer of bubble wrap for your most prized pairs.
Pro Tip: Never use plastic bags to wrap leather or suede shoes. They trap moisture, which is a perfect recipe for mould and mildew, especially if your things are going to be in transit or storage for more than a day or two.
Taming Bulky Boots and Sturdy Footwear
Winter boots, walking boots, and other bulky footwear can feel awkward to pack, but a little strategy makes a huge difference. Their weight and size mean they should always form the base layer of any shoe box, providing a stable foundation for lighter pairs on top.
Make the most of the empty space inside them by stuffing them with smaller items. You can easily pack them with things like:
- Rolled-up belts or scarves
- Multiple pairs of socks
- Small, non-fragile items
Once filled, wrap each boot separately. To maximise space in the box, place them in a heel-to-toe arrangement, much like they come in their original shoebox. For taller boots like Wellingtons, placing them vertically along the sides of the box can be a very efficient use of space.
A strong, appropriately sized container, such as a 12x12x6 single wall box, offers a great balance of sturdiness and manageable size for a few pairs of heavy boots. This stops the box from becoming too heavy while offering plenty of protection.
Smart Strategies for Loading Your Shoe Boxes
How you arrange your shoes inside the moving box is just as important as how you wrap them. I like to think of it as a game of Tetris – the goal is to create a dense, stable block with no wasted space. This strategic approach not only protects your footwear but also makes the boxes much easier and safer for you or your removal team to handle.
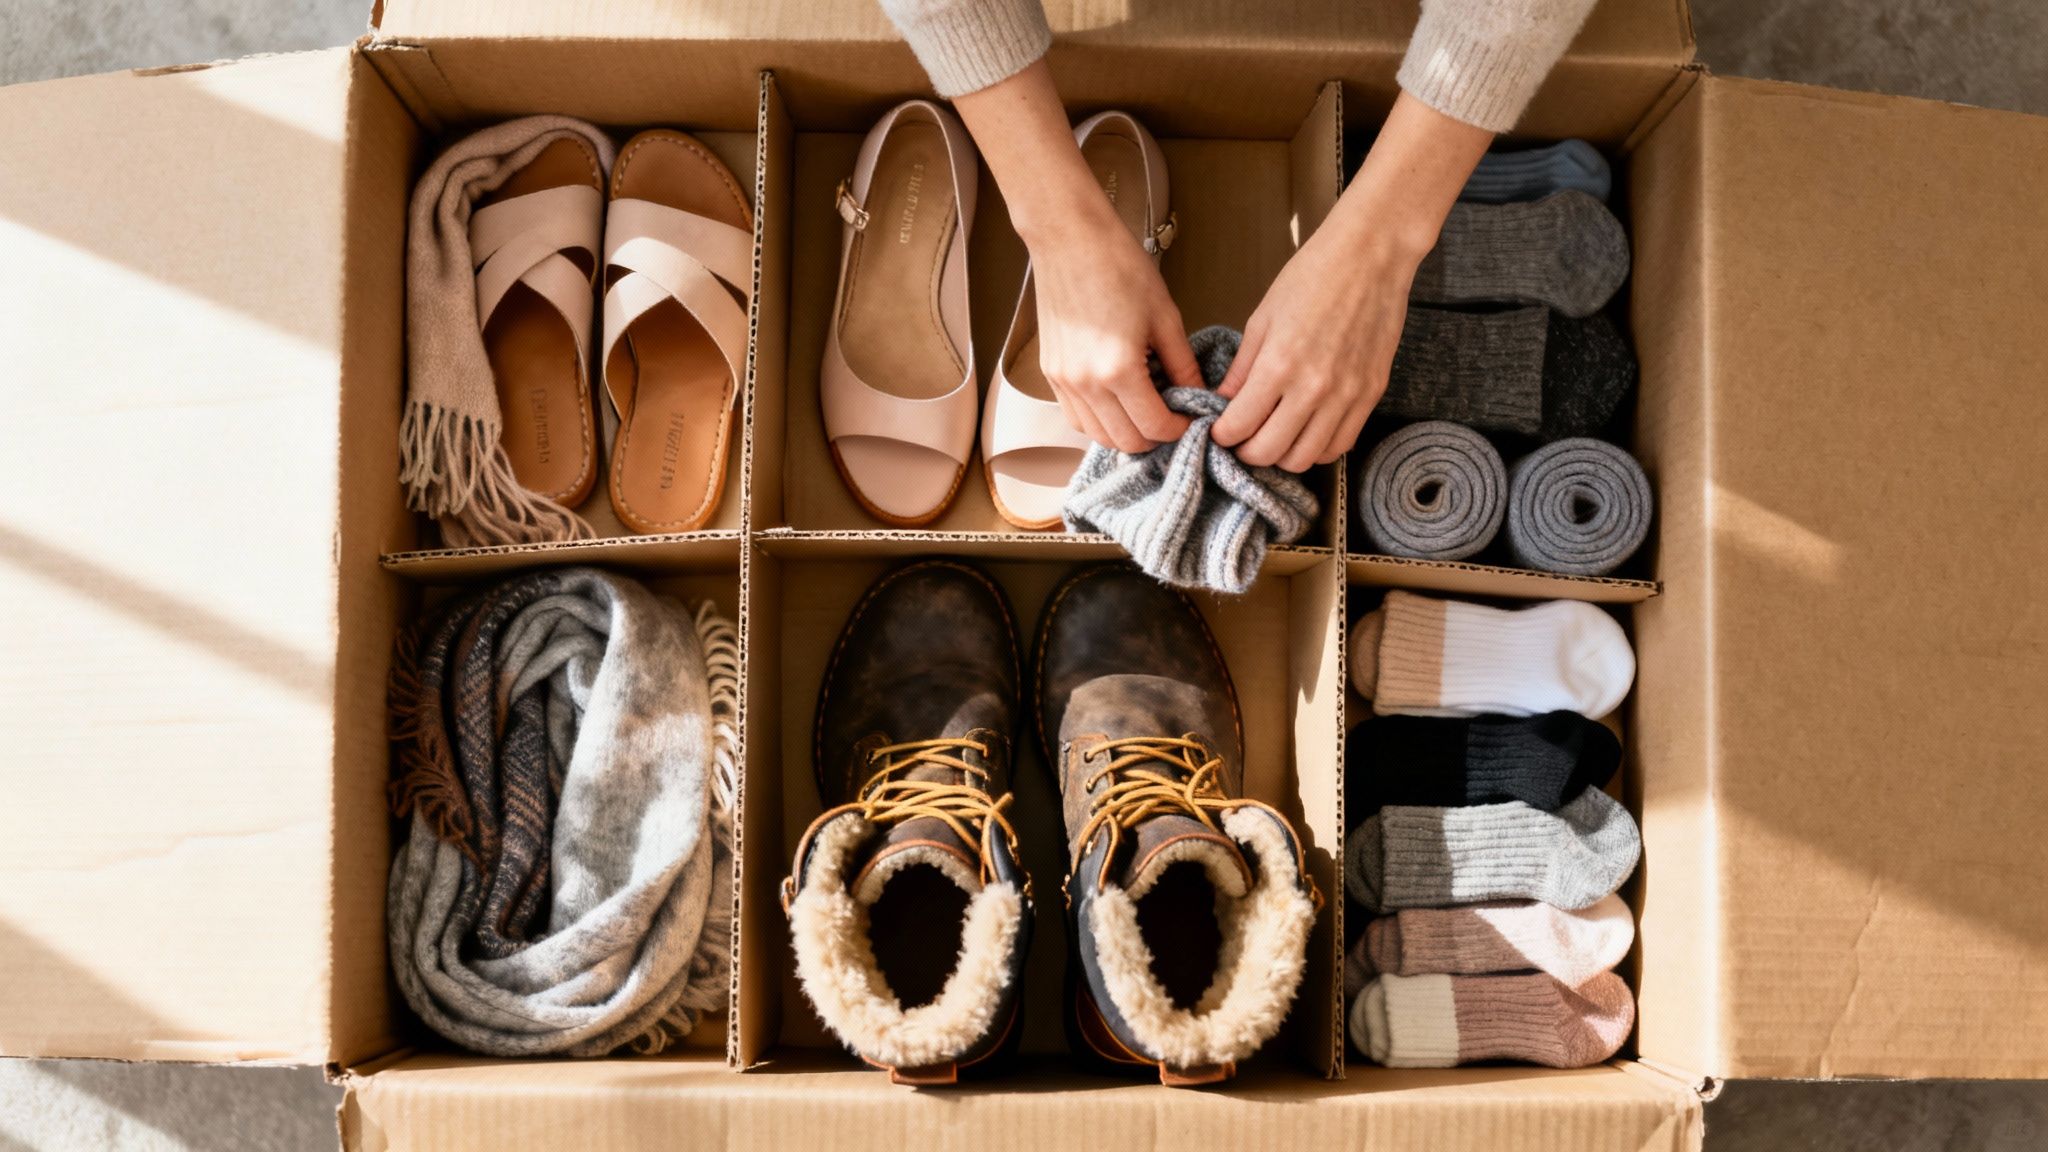
The secret lies in layering. A well-packed box is a balanced box, which stops everything from shifting around and getting damaged on the journey.
Build a Strong Foundation
Always start with your heaviest and most robust pairs at the bottom. This creates a solid base that won't get crushed under the weight of the shoes you'll stack on top.
Think about your bulkiest footwear first:
- Sturdy walking boots
- Heavy-duty work boots
- Wellington boots
- Chunky platform shoes
By creating this solid foundation, you’re providing crucial support for the more delicate footwear above. It’s a simple trick that prevents the sides of the box from bowing and protects everything inside.
Layer Lighter Shoes on Top
Once your base layer is in place, you can start adding your lighter, more delicate shoes. Your trainers, flats, and sandals should go in the middle and upper layers.
For your most fragile pairs, like stilettos or embellished heels, make sure they are positioned right at the very top where they'll face the least amount of pressure. This tiered method ensures the weight is distributed logically, stopping lighter shoes from being squashed by heavy boots.
A common mistake is to overpack a box just to save a bit of space. This almost always leads to crushed shoes at the bottom and creates a box that is dangerously heavy to lift. As a rule of thumb, aim for a maximum weight of around 15kg per box.
For really bulky pairs like boots, a great space-saving trick is to wrap them in paper and place them soles-to-soles in larger wardrobe boxes. This can save 20-30% of space in a standard removal van. It’s a bigger issue than you might think; in regions like Yorkshire, which has seen a big rise in local moves, improper shoe packing contributed to 15% of reported van overloading issues.
Fill Every Empty Gap
Empty space is the enemy of a securely packed box. Any gaps allow your shoes to shift, slide, and knock against each other during transit, which is exactly how scuffs and damage happen. The aim is to create a densely packed unit where nothing can move.
Use soft, lightweight items to fill any remaining voids. This not only secures the contents but is also a clever way to pack other small belongings at the same time.
Consider tucking in:
- Clean, rolled-up socks
- Soft scarves or pashminas
- Lightweight jumpers or cardigans
- Small, soft toys
This simple step transforms your box from a loose collection of items into a solid, stable block. For boxes with very delicate or high-value shoes, consider using clear “Do Not Stack” labels for extra protection. This gives your movers a clear visual cue that the box should be placed on top of a stack, not buried at the bottom.
Labeling and Unpacking Systems to Save Your Sanity
After all that careful wrapping and packing, it’s these final details that make the difference between a chaotic moving day and a smooth, organised one. A smart labelling system is your secret weapon. It’s what stops you from tearing through every single box just to find your trainers.
Vague labels are a recipe for frustration. Simply writing "Shoes" on a box is a start, but it’s no help when you desperately need your work loafers for a meeting the next morning. A little extra detail goes a very long way.
Go Beyond Basic Labels
Get specific with your marker pen. Think of it as leaving clear instructions for your future, frazzled self. Your goal is to know exactly what's in a box without having to slice it open.
A good label needs three key bits of information:
- Specific Contents: Instead of "Shoes," write "Winter Boots & Wellingtons" or "Summer Sandals & Flats."
- Destination Room: Clearly mark "Master Bedroom," "Hall Cupboard," or "Utility Room."
- Priority Level: A simple star or the word "ESSENTIAL" tells you this box is a priority.
This simple habit turns a daunting pile of cardboard into an organised system, guiding you or your removal team to put boxes in the right rooms from the get-go.
The most crucial box you'll pack is your 'Essentials Box.' This should have the shoes you'll need for the first 24-48 hours in your new home—think slippers, your go-to trainers, and work shoes. Keep this box with you in your car, not on the moving lorry.
A Smart Unpacking Strategy
When you arrive, resist the urge to open boxes at random. Start with your essentials box to get immediate access to what you need. Then, unpack based on the season and your immediate plans. If you're moving in July, the box labelled "Winter Boots" can definitely wait.
This methodical approach really pays off, especially during busy moving periods. For instance, a whopping 27% of house moves happen on a Friday, which can stretch unpacking times across the whole weekend. Data from removal firms shows that having a clear system, like properly taped and labelled boxes, can slash unpacking delays by up to 30%. That's a huge saving when you consider that 85% of movers face potential delays on peak days.
By thinking about unpacking while you pack, you set yourself up for a much calmer and more organised start in your new place. It’s the final piece of the puzzle.
Common Shoe Packing Questions Answered
Even with the best packing plan in the world, you’re bound to hit a few little snags. When it comes to something as specific as how to pack shoes for moving, a few common questions always crop up. Getting a straight answer can make those final packing stages so much less stressful and give you the confidence that you’re doing it right. Let's tackle some of the dilemmas we see movers face all the time.
Should I Pack Shoes in Their Original Boxes?
If you’ve held onto them, then using the original shoe boxes is a fantastic option. They are, after all, perfectly sized to protect that specific pair, and they stack beautifully inside a larger moving box. The only real downside is that they can be pretty bulky and take up a surprising amount of space in the van.
For anyone tight on room, wrapping pairs individually is often the more efficient choice. It lets you pack them more densely into a standard moving box, almost like a game of Tetris.
How Many Pairs of Shoes Go in One Box?
For a standard medium-sized moving box, a good guideline is somewhere between 5-10 pairs, but this really depends on the type of shoe. A box full of flip-flops is a very different beast to one full of chunky walking boots. The main goal here is to keep the box weight manageable ideally under 15kg to stop the shoes at the bottom from getting crushed.
A good pro tip is to always place your heaviest footwear, like boots or platforms, at the base of the box to create a solid foundation. If you’re packing very expensive or delicate pairs, it's always wise to pack fewer pairs per box to allow for extra cushioning.
Packing is a major source of moving anxiety. Stress is cited as the top reason 35% of UK residents decide against moving, with poorly packed items like unsecured shoes amplifying the chaos. This is especially true when you consider that 1 in 4 overloaded vans report damage from items tumbling around.
What Is the Best Way to Pack Smelly Gym Shoes?
First things first, make sure your trainers are completely clean and bone-dry before they go anywhere near a box. To deal with any lingering odours during the move, just pop an unused tea bag or a dryer sheet inside each shoe.
These work as brilliant, simple deodorisers. Before you put them in a box with anything else, it's a good idea to seal them in their own plastic bag to contain any smells. It’s definitely best to pack them alongside other durable items rather than right next to your best leather brogues. For more general advice, you can check out some other frequently asked moving questions to help you prepare.
At The Box Warehouse, we provide all the professional-grade packing materials you need for a secure and organised move. From sturdy double-walled boxes to acid-free tissue paper, we've got you covered. https://www.theboxwarehouse.co.uk


