Published on : 13 November 2025
A Stress-Free Guide on How to Pack for Moving
The secret to a stress-free move has nothing to do with a last-minute flurry of throwing things into boxes. The real key? A solid game plan that kicks off weeks, or even months, before the moving van shows up. This early phase is all about decluttering ruthlessly, gathering the right supplies, and mapping out a timeline that breaks an overwhelming job into bite-sized pieces.
Your Pre-Packing Game Plan and Moving Timeline
A good move is built on a foundation of solid prep work. Diving straight into packing without a clear strategy is just asking for chaos, lost items, and a whole lot of unnecessary stress. By putting in the time upfront to plan, you make the physical act of packing so much easier and end up saving yourself time and money. It all starts with deciding what’s actually worth moving in the first place.
The Power of an Early Declutter
Before you even think about buying a single box, your first mission is to lighten the load. Every single thing you get rid of is one less item to pack, haul, and unpack on the other side. Go through each room and be brutally honest about what you genuinely use and love.
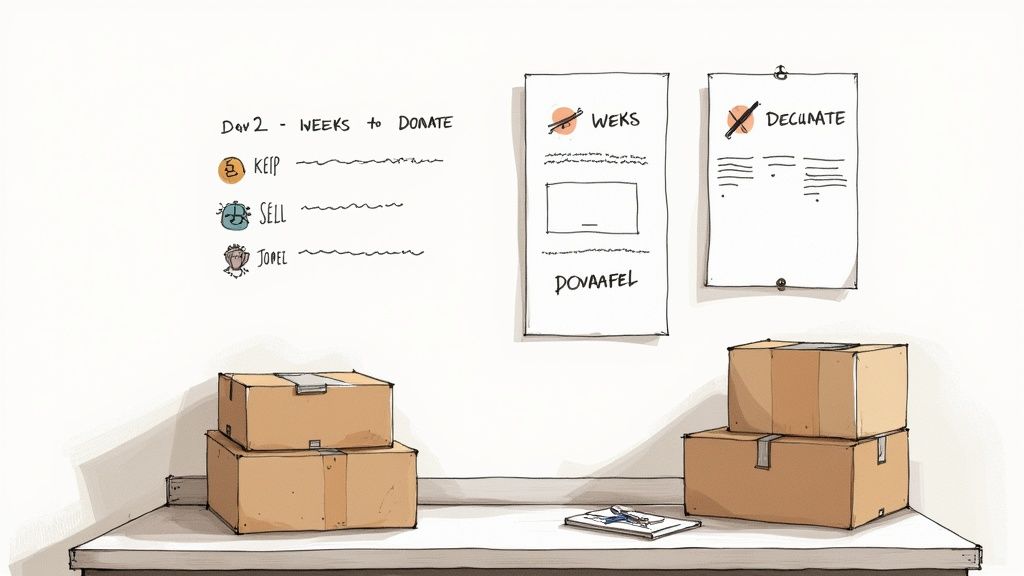
This is your chance to sort everything into four simple categories:
- Keep: The things you use regularly or can't bear to part with.
- Sell: Good-quality items you no longer need can find a new home online or at a car boot sale.
- Donate: Give your gently used belongings a second life by dropping them off at a local charity shop.
- Discard: Anything broken, out-of-date, or unusable needs to be binned or recycled responsibly.
Getting serious about this step can massively shrink the volume of your belongings, which can directly lower your removal costs. For a more in-depth strategy, check out our guide to decluttering your home before moving.
A truly organised move begins long before the first box is taped shut. When you create a timeline and declutter properly, you turn a mountain of a task into a series of achievable goals, paving the way for a much smoother, less stressful relocation.
The infographic below gives a great visual overview of the key stages of moving prep.
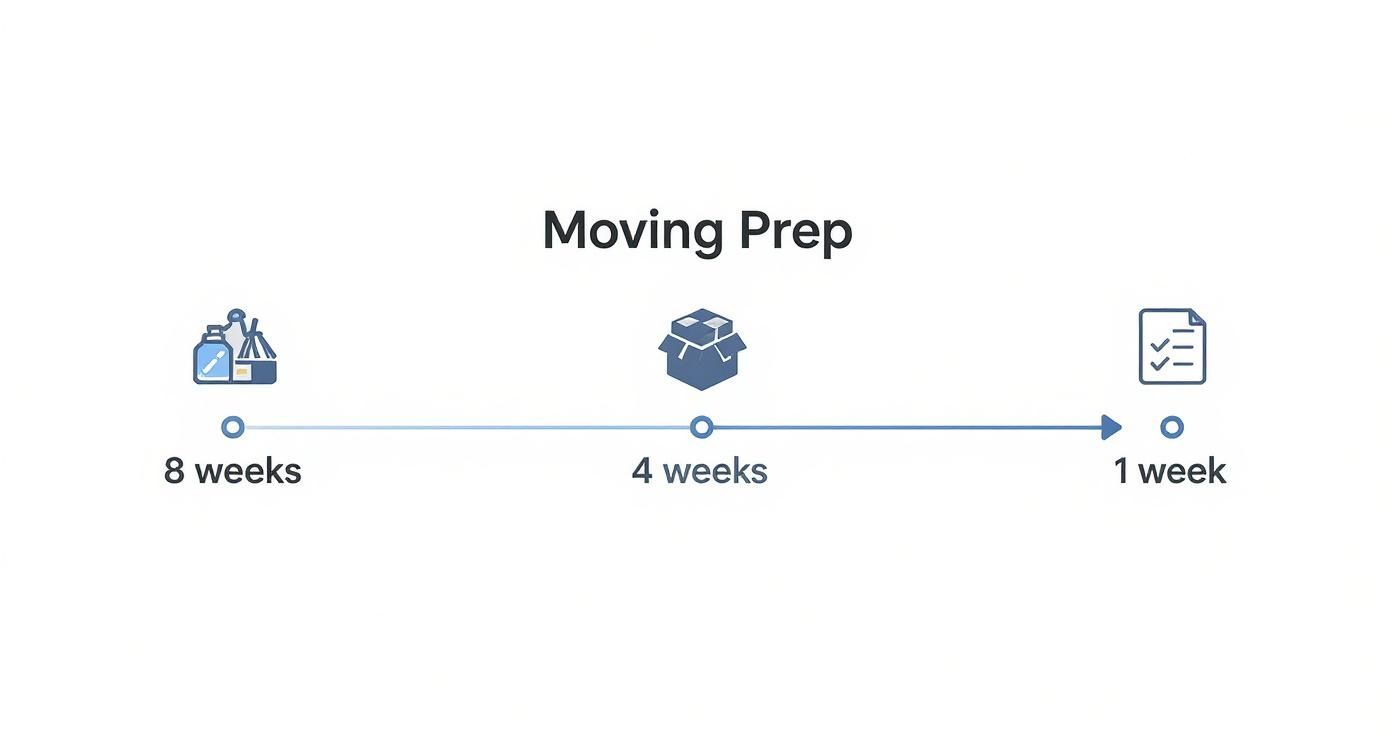
As you can see, spacing out tasks from decluttering eight weeks out to final checks at one week is the best way to avoid that last-minute panic.
Set Up a Moving Hub
Pick one spot in your home, a spare room, a corner of the garage, anywhere out of the way and make it your official "moving hub". This is where you’ll stash all your packing materials: boxes, tape, bubble wrap, labels, and marker pens. Keeping everything in one place saves you from constantly hunting for supplies and helps keep your main living areas from becoming a chaotic mess.
This organised approach really pays off, especially when you consider how much moving costs have gone up. The price of hiring professional movers in the UK has shot up over the last five years. Back in 2018, the average cost for a three-bedroom house move was around £950. Fast forward to 2025, and that same move now averages £1,300 or more,that's a hefty 30 percent increase. Planning ahead and decluttering to reduce your load can make a real difference to your final bill.
Map Out a Realistic Timeline
The best way to avoid feeling completely overwhelmed is to spread the packing process out over several weeks. A structured timeline helps you stay on track without turning your daily life upside down. We recommend starting about eight weeks before your moving date.
Here’s a simple week-by-week guide to get you started.
Your 8-Week Moving Packing Timeline
| Timeframe | Key Packing Tasks |
|---|---|
| 8 Weeks Out | Declutter ruthlessly. Sort items to keep, sell, donate, or discard. Research removal companies and get quotes. |
| 6-7 Weeks Out | Order all your packing supplies: boxes, tape, bubble wrap, labels. Start packing non-essential items like out-of-season clothes, books, and decorative pieces. |
| 4-5 Weeks Out | Pack up items from lesser-used rooms (guest bedrooms, loft, garage). Start labelling every box with its contents and destination room. |
| 2-3 Weeks Out | Pack most of your kitchen, leaving only the daily essentials. Disassemble any furniture that can be taken apart. |
| 1 Week Out | Pack a "first night" box with essentials. Confirm all details with your removal company. Finish packing all remaining items except what you'll need on moving day. |
This systematic approach ensures you have everything you need right up until the last minute, making the whole process feel much more controlled and far less frantic.
Mastering the Art of Packing, Room by Room
Looking at your entire home and thinking "I have to pack all of this" is a sure-fire way to feel completely overwhelmed. Trust me, a much better way to go about it is to break the job down and focus your energy on one room at a time. Every space comes with its own quirks, from the delicate glassware in the kitchen to that tangled mess of cables behind the TV and each needs its own game plan.
When you tackle packing room by room, you turn one enormous mountain into a series of small, manageable hills. This keeps you organised, sane, and makes sure you’re using the right materials and techniques for everything you own. Let's get started, beginning with the heart of the home.
Conquering the Kitchen Chaos
The kitchen is nearly always the toughest room to pack. It’s not surprising, really. It’s jam-packed with fragile dishes, sharp knives, heavy appliances, and awkwardly shaped pans. The trick is to start with the things you use least, think special occasion dinnerware, that giant serving platter, or seasonal gadgets.
When it comes to your plates and bowls, the golden rule is to pack them on their edge, never flat. Stacking them is just asking for trouble. Wrap each one in packing paper (or even a tea towel) and stand it vertically inside a sturdy, double-walled box. This simple switch massively cuts down the risk of breakages.
Glassware needs a bit of extra TLC.
- Cell Dividers Are Your Best Friend: Use cardboard cell dividers inside your boxes. They create individual pockets for glasses, mugs, and wine bottles, stopping them from clattering against each other during the move.
- Stuff and Wrap: Before you put a glass in its cell, stuff the inside with crumpled packing paper for extra support, then wrap the outside as well.
- Use Your Linens: You can save a bit on bubble wrap by using tea towels, hand towels, or even clean socks to cushion fragile bits and pieces.
For heavy appliances like toasters and blenders, their original boxes are ideal if you’ve kept them. If not, a strong, medium-sized box with plenty of crumpled paper stuffed around the sides for padding will do the job just fine.
Living Room Logistics
The living room is usually where you find your bulkiest furniture and most delicate electronics. Before you unplug a single thing, take a quick photo of the back of your TV and other entertainment gear. It’ll be a lifesaver when you’re trying to remember how all those cables reconnect in your new home.
A simple tip I’ve learned is to use coloured stickers or labelled tape on each end of a cable and its corresponding port. It saves so much frustration later. Once they’re organised, pop all the cables for one device into a labelled ziplock bag.
A quick pro tip: as you pack electronics and other valuable items, create a high-value inventory. Jot down serial numbers and snap a few photos. This is brilliant for your own peace of mind and essential if you ever need to make an insurance claim.
When it comes to furniture, take off any removable parts like legs or shelves. Put all the screws and bolts in a clearly labelled bag and tape it securely to the main piece. Use furniture blankets or old duvets to wrap wooden items and stop them from getting scratched. For the ultimate protection, specialised sofa and armchair covers are a fantastic investment against dirt and tears.
Bedroom Packing Simplified
Bedrooms can actually be packed pretty quickly if you’re smart about it. Wardrobe boxes are a game-changer; you can move clothes straight from your closet on their hangers, keeping them clean and wrinkle-free. For everything else, try rolling your clothes instead of folding them flat, it’s amazing how much more you can fit in a box.
Vacuum-sealed bags are another secret weapon, especially for bulky items like duvets, pillows, and winter coats. You can shrink their volume by up to 75%, which frees up a huge amount of space in the moving van.
And whatever you do, don't forget a heavy-duty mattress cover. It’s non-negotiable for protecting against dust, moisture, and scuffs. Trust me, a clean bed to fall into after a long moving day feels like pure luxury.
Handling the Bathroom
Packing toiletries and medicines is all about preventing a sticky mess. First things first, be ruthless. Get rid of any nearly empty bottles or expired products, there’s no point moving clutter. For the liquids you are taking, here’s a brilliant little trick to prevent leaks.
- Unscrew the cap from the bottle (shampoo, lotion, etc.).
- Place a small square of cling film over the opening.
- Screw the cap back on tightly over the film.
This creates an extra seal that works wonders. Pack all your toiletries in a plastic-lined box or a wash bag, just in case something does manage to leak. And remember, keep any essential medicines with you in your "essentials" box, not buried in the back of the moving van.
The Garage and Shed Strategy
The garage, shed, or loft is where things can get heavy, sharp, or even a bit hazardous. Safety first is the motto here. Start by setting aside anything movers won’t take, like petrol, paint, and propane tanks. Check with your local council on how to dispose of them properly.
Clean your tools and pack them securely. Wrap sharp blades in old towels or cardboard and tape them up. Long-handled garden tools like rakes and shovels can be bundled together with tape or zip ties, which makes them much easier and safer to carry.
For smaller tools and bits of hardware, use a proper toolbox or small, strong boxes. Just be careful not to make them too heavy; a box full of metal tools gets heavy fast. Always use double-walled boxes for these items and make sure to label them clearly as 'HEAVY' on all sides. This room-by-room plan makes the whole process of packing feel much more manageable.
Advanced Techniques for Packing Fragile and Valuable Items

Some of your belongings are more than just things; they carry memories, stories, and sentimental weight. When it comes to packing, these are the items that often cause the most stress—delicate heirlooms, valuable artwork, or bulky musical instruments. Your standard packing methods just won't cut it here.
To make sure these pieces arrive at your new home in one piece, you need a more robust strategy. This is where a few professional techniques come in, giving you that extra layer of security and the confidence to handle your most precious items without the anxiety.
The Double-Boxing Method for Ultimate Protection
For exceptionally fragile things like antique china, crystal glassware, or small sculptures a single box is a risk you don't want to take. The double-boxing method is the gold standard used by professional movers for a reason: it creates a brilliant shock-absorbing buffer zone that shields contents from knocks and drops.
Think of it as creating a box within a box. First, wrap your item meticulously and place it snugly in a small, sturdy box. Fill any empty space with packing peanuts or crumpled paper so it can't shift around.
Next, find a larger box that's at least two inches bigger on all sides. Line the bottom with a thick layer of cushioning, centre the smaller box inside, and then fill the gap all around it with more packing material. This suspends the inner box, stopping it from touching the outer walls and absorbing any bumps along the way. For a great walkthrough, our guide on how to pack fragile items with bubble wrap has some excellent step-by-step instructions.
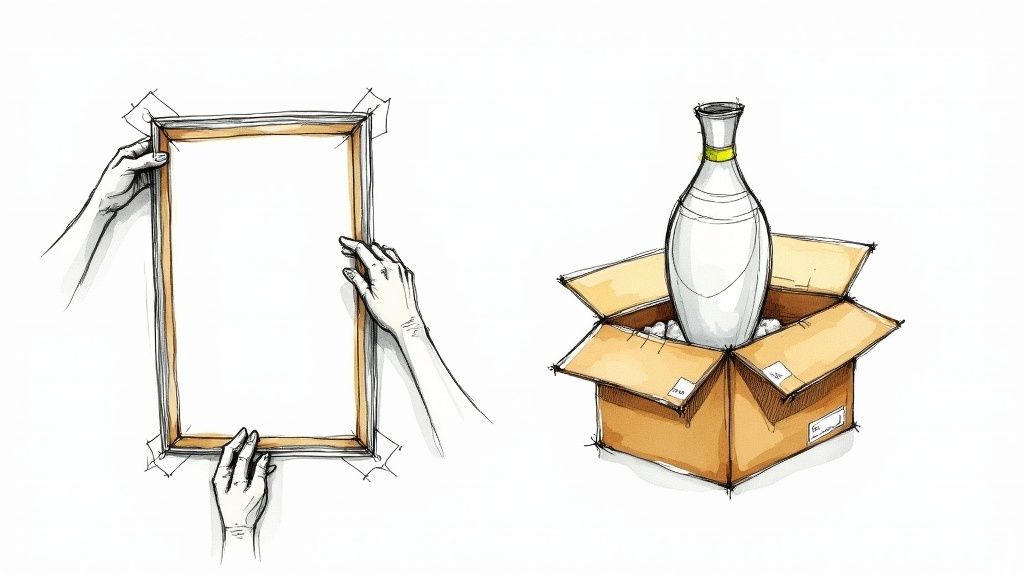
Securing Artwork, Mirrors, and Pictures
Mirrors and framed art are always a bit tricky because of their size and delicate surfaces. The goal is to protect both the glass and the frame from scratches, pressure and impact. One quick tip: never wrap them in newspaper, as the ink can easily transfer and stain the artwork or frame, use clean packing paper.
Start by placing a large 'X' across the glass with painter's tape. This won't stop the glass from breaking, but if an accident does happen, it will hold the pieces together and prevent shards from damaging the art itself.
Here's how to get them wrapped up securely:
- Protect the Corners: Slide cardboard corner protectors onto all four corners. They’re inexpensive and provide vital protection against dents and chips.
- Wrap in Bubblewrap: Give the entire piece a generous wrap with at least two layers of bubble wrap, securing it with packing tape. Pay close attention to the corners.
- Use a Speciality Box: Slide the wrapped item into a proper picture or mirror box. These are designed to be flat and are often adjustable, giving you a secure, snug fit.
For real peace of mind, create a quick high-value inventory list as you go. Jot down the item, its condition, and its estimated value, and take a quick photo on your phone. This documentation is invaluable for insurance and helps you make sure everything has arrived safely.
Packing Books and Vinyl Records Correctly
Any collector will tell you that books and vinyl records are surprisingly heavy and easily damaged if packed the wrong way. The biggest mistake people make is using a box that's too big. The weight quickly becomes unmanageable, and you run the risk of the box splitting open. Always use small, strong, double-walled boxes for these items.
When it comes to packing books, you've got a few options depending on what they are:
- Hardcovers: Stand them upright with the spines against the side of the box, just like they'd sit on a bookshelf.
- Paperbacks: You can pack these either flat or with their spines down.
- Valuable Books: Wrap each one individually in packing paper before boxing them up to protect the dust jackets and covers from scuffs.
Vinyl records must always be packed standing on their edge, never flat. Stacking them horizontally is a sure way to cause warping and permanent damage. Pack them snugly together in a small box so they can’t shift, but don't cram them in so tightly that you create pressure. A few cardboard inserts or some crumpled paper can fill any small gaps and keep them upright and secure in transit.
A Smart System for Labelling and Tracking Your Boxes
When the packing is finally underway, it’s tempting to breathe a sigh of relief. But without a decent labelling system, you’re just pushing the chaos forward to unpacking day. I've seen it a hundred times: scribbling "Kitchen Stuff" on a box feels quick and easy, but it turns into a nightmare when you're desperate for the coffee machine on that first morning.
A truly smart system is more than just a basic description. It turns your mountain of boxes into an organised, trackable inventory that makes directing movers and finding your essentials dead simple. It’s the difference between a calm, methodical unpack and a frantic hunt through dozens of identical cardboard cartons.
Get Organised with a Colour and Number System
The most effective method I've found combines two simple things: colour-coding and numbering. It’s a logical, easy-to-manage approach that pays off massively on moving day.
First up, assign a colour to each room in your new place. For instance:
- Blue: Kitchen
- Green: Living Room
- Yellow: Main Bedroom
- Red: Bathroom
You can grab some coloured labels or even just use different coloured marker pens. The key is consistency. Every single box heading for the kitchen gets a big blue mark on at least three sides. This visual cue means you and the movers can tell at a glance where everything goes, speeding up the whole unloading process.
Next, give every box a unique number. Just start at 1 and keep going until the last box is taped up. Write this number clearly next to the colour code—it’s the backbone of your entire tracking system.
Create Your Master Inventory List
With your numbering sorted, it’s time to create a master inventory list. This can be a simple spreadsheet, a note on your phone, or even a good old-fashioned notebook. For each box number, you’ll jot down two key details: its destination room and a brief summary of what’s inside.
Your list might look something like this:
| Box Number | Room (Colour) | Contents |
|---|---|---|
| 01 | Kitchen (Blue) | Everyday plates, bowls, mugs. Kettle. |
| 02 | Living Room (Green) | Books (sci-fi), photo albums. |
| 03 | Kitchen (Blue) | Cutlery drawer contents, utensils, can opener. |
This list does more than just help you find things. On moving day, you can use it as a checklist to tick off every box as it comes off the van. It gives you complete peace of mind that nothing has been left behind.
Don't Forget Clear Handling Instructions
Finally, always add clear handling instructions. This is vital for protecting your belongings and helping your moving team work safely. Use big, bold letters to mark boxes with special contents. Grabbing a roll of pre-printed FRAGILE labels is a brilliant, time-saving investment.
You also need to clearly mark any boxes that are particularly heavy. This isn't just a suggestion; it’s a crucial safety consideration for anyone who has to lift them. These simple markings are a non-negotiable part of packing safely and effectively. It’s details like this that show why so many people turn to the pros, in fact, full-service removals still hold a 43.7 percent market share, proving there's a huge demand for expert handling.
Preparing Your Moving Day Essentials Box
Think of your essentials box as your moving day survival kit. It’s the very last thing you’ll pack up at your old place and the absolute first box you’ll open when you walk through the door of the new one. Getting this right is the difference between a chaotic first night and a comfortable, stress-free one.
Whatever you do, don't let this box end up on the removal van. Keep it with you in the car. This guarantees you have immediate access to everything you need after a long day of lifting and shifting, without having to dig through a mountain of cardboard just to find a phone charger. It’s your personal go-bag for the entire move.
What to Include in Your Kit
So, what actually goes inside? Think about everything you'll desperately need in the first 24 hours. The whole point is to avoid that late-night panic when you realise the kettle, the loo roll, or your child's favourite teddy is buried in a box somewhere in the garage. A well-stocked essentials box is a genuine lifesaver.
Your checklist should cover a few key areas:
- Important Documents: Keep passports, driving licences, house deeds, and the moving contract safe and together in a secure folder. You don't want these getting misplaced.
- Basic Kitchen Supplies: The kettle is non-negotiable! Pack it with mugs, tea bags, instant coffee, and a few easy snacks. A local takeaway menu is a brilliant idea, too.
- Essential Toiletries: A fresh roll of toilet paper will be the first thing you're glad you packed. Also include hand soap, toothbrushes, toothpaste, and any daily medications for everyone in the family.
- Electronics: Phone chargers are a must. A portable power bank is also a fantastic idea, just in case you can't find a free socket straight away.
A top tip from us: don’t forget a simple toolkit. A box cutter, a multi-tool with a screwdriver, and a torch will be more useful than you can imagine. Chucking in a small first-aid kit with plasters and pain relief is also a very smart move.
Common Questions We Always Get Asked About Packing
Even the best-laid packing plans can hit a snag. After years in the business, we've heard just about every question you can imagine. Here are a few of the most common ones that pop up when you're knee-deep in boxes and tape.
How Many Boxes Do I Actually Need?
This is the million-dollar question, isn't it? While there’s no single magic number, a good rule of thumb is to budget for around 10-15 boxes per room. A one-bedroom flat might need 20-30 boxes, whereas a three-bedroom house could easily need 60-80 boxes, sometimes more.
My best advice? Always get more than you think you'll need. Running out of boxes mid-pack is a classic moving-day nightmare. Any spares can be used for last-minute bits and bobs or to double-box that extra-fragile vase from your gran.
Should I Leave My Clothes in the Drawers?
It’s so tempting to just tape the drawers shut and call it a day, but I’d strongly advise against it. Professional removal companies will almost always ask you to empty them, and for good reason. Full drawers make furniture incredibly heavy and unbalanced, which seriously increases the risk of damage or even injury.
Our Pro Tip: Take the extra ten minutes to empty them. It keeps your clothes clean, makes the furniture much lighter and safer to handle, and stops the drawers from sliding open and getting damaged in the van. Wardrobe boxes are a lifesaver for hanging clothes, and standard boxes work perfectly for everything else.
What Should I Do with All the Food in the Fridge and Pantry?
Your mission, should you choose to accept it, is to eat your way through your kitchen! Start a few weeks before the move. The less you have to deal with on the day, the better. Any unopened, non-perishable items like tins and pasta can be donated to a local food bank.
When it comes to the fridge and freezer, eat what you can and get rid of the rest a day or two before the move. Never, ever pack perishable food. It won't survive the journey and can make an unbelievable mess. A clean, empty fridge is exactly what you want on moving day.
Having the right supplies makes all the difference for a smooth move. The Box Warehouse stocks everything from heavy-duty removal boxes to protective furniture covers, all delivered straight to your door. Take a look at our complete moving kits and bulk options to get properly set up.


