Published on : 19 November 2025
Packing photo frames: Expert Tips for Safe Moving
Here’s How to Prep Your Frames for a Safe Move
The real secret to packing picture frames without a single crack or scratch isn't just about wrapping them up; it all starts before you even touch a roll of tape. Getting your space organised, giving your frames a good clean and deciding how to handle each one is the groundwork that makes all the difference.
Taking a few moments to prep properly prevents annoying scratches, makes the actual wrapping a breeze, and ensures your favourite memories arrive in one piece.
First things first, clear a dedicated packing station. A dining table or even a protected spot on the floor will do the trick, just lay down a removal blanket. Having all your supplies ready and within reach stops you from leaving half-packed frames precariously balanced somewhere, minimising the risk of a clumsy accident.
This organised approach is more important than ever. With the UK picture frame market set to grow by about 3.6% annually through 2030, our walls are holding more frames than ever before. A systematic method isn’t just nice to have; it’s essential.
Create a Quick Inventory
Before you dive in, take a couple of minutes to catalogue what you're packing, especially if you have valuable or really sentimental pieces. It doesn't need to be complicated; a simple list on your phone with a quick photo of each frame is perfect. Jot down the size, the material (like ornate wood or sleek metal), and any existing scuffs. You’ll be glad you have this record if you ever need to make an insurance claim.
Give Them a Thorough Clean
Dust and little bits of grit are your worst enemies when packing. If tiny particles get trapped between the glass and the bubble wrap, they can easily cause a web of fine scratches as the frame gets jostled around in transit.
- For the Glass: Grab a soft, lint-free microfibre cloth. Spray a gentle glass cleaner onto the cloth itself, not directly onto the glass. This simple trick prevents any liquid from seeping under the frame and ruining the photo or artwork inside.
- For the Frame: A quick wipe with a dry cloth is usually all that’s needed to get rid of dust. If you're dealing with wooden frames, make absolutely sure they are completely dry before you start wrapping to avoid any moisture damage.
Know When to Take Them Apart
For those really big, valuable, or intricately designed frames, it’s often worth disassembling them. By taking the artwork and glass out of a heavy or ornate frame, you can pack each component individually. This gives every part the specific protection it needs and takes a lot of stress off the frame’s joints during the move.
Pro Tip: If you do take the back off a frame, pop all the little screws, clips, or hanging wires into a small plastic bag. Label it clearly and tape it firmly to the wrapped frame backing. Trust me, this tiny step will save you a massive headache when it’s time to unpack and hang everything up again.
By putting in the effort here, you’re setting yourself up for success. The next step is choosing the right materials to finish the job and that means getting some sturdy foam corners to give every piece that final, crucial layer of protection.
Gathering the Right Packing Materials
Let's be honest, skimping on supplies is the quickest way to turn a moving day into a heartbreaking one. When you're dealing with framed photos or artwork, the quality of your materials is everything. Think of it as an insurance policy against the bumps, drops, and rattles that are an inevitable part of any move.
Your Frame Packing Toolkit
Before we dive into the wrapping techniques, let's get your toolkit sorted. Having the right gear on hand makes the whole process smoother and, more importantly, safer for your cherished items. Here’s a quick rundown of what you’ll need and why.
| Material | Primary Use | Pro Tip |
|---|---|---|
| Double-Wall Boxes | Providing a strong, rigid outer shell for your frames. | Choose a box slightly larger than your wrapped frame to allow for padding. |
| Foam Corner Protectors | Shielding vulnerable corners from direct impact. | Apply these before you start wrapping with bubble wrap. |
| Bubble Wrap | Creating an all-over cushioned layer against shocks. | Use the "mummy wrap" technique for full coverage. |
| Packing Tape | Securing the wrap and sealing the box shut. | Invest in a tape gun for faster, more secure sealing. |
Having these specific items ready means you're building a purpose-designed protective system for each frame, not just chucking things in a box and hoping for the best.
The Foundation: It Starts with the Box
The foundation of any solid packing job is the box itself. While you might be tempted to use standard moving boxes, anything with glass absolutely needs an upgrade. Always, always opt for double-wall boxes.
That extra layer of corrugated cardboard makes a world of difference. It gives the box far more rigidity and shock absorption, which is vital for stopping it from being crushed under the weight of other things in the back of a removal van.
Your Cushioning Essentials
With your boxes sorted, the next job is to create a soft, protective cocoon around each frame. This is where your cushioning materials come in and a couple of items are completely non-negotiable.
First up, foam corner protectors. I can’t stress this enough, these little foam pieces are your first line of defence. They slide right onto the corners of your frame, absorbing the shock from accidental drops and stopping those frustrating dents and chips before they happen. They protect the most vulnerable part of the frame.
While packing paper is great for filling empty spaces, it offers very little in the way of real cushioning. For genuine impact protection, you need a high-quality bubble wrap. You can find a fantastic selection of bubble wrap for moving house that provides the perfect air-filled buffer without adding too much bulk. A secure wrap creates a shield against all the jostling that’s bound to happen during the move.
A Few More Tools for the Job
Beyond the basics, a few other supplies will make your life easier and your frames safer.
- Packing Paper: Perfect for scrunching up and stuffing into any empty gaps inside the box. A tightly packed box is a safe box, it stops things from sliding around and bumping into each other.
- Archival Glassine Paper: If you're packing valuable artwork or old photographs that aren't behind glass, a layer of this acid-free paper is a must. It lays flat against the surface to prevent scratches and stops any potential chemical damage over time.
- Strong Packing Tape: This isn't the place to cut corners. Don't just grab the cheapest tape you can find. A quality, strong-adhesive packing tape ensures your boxes stay sealed shut, reinforcing their overall strength.
Expert Insight: Always over-tape the bottom of your boxes. I recommend a cross-hatch or "H" pattern. A single strip of tape is rarely strong enough to hold the weight of multiple frames, and having the bottom of a box give way while you're lifting it is a disaster waiting to happen.
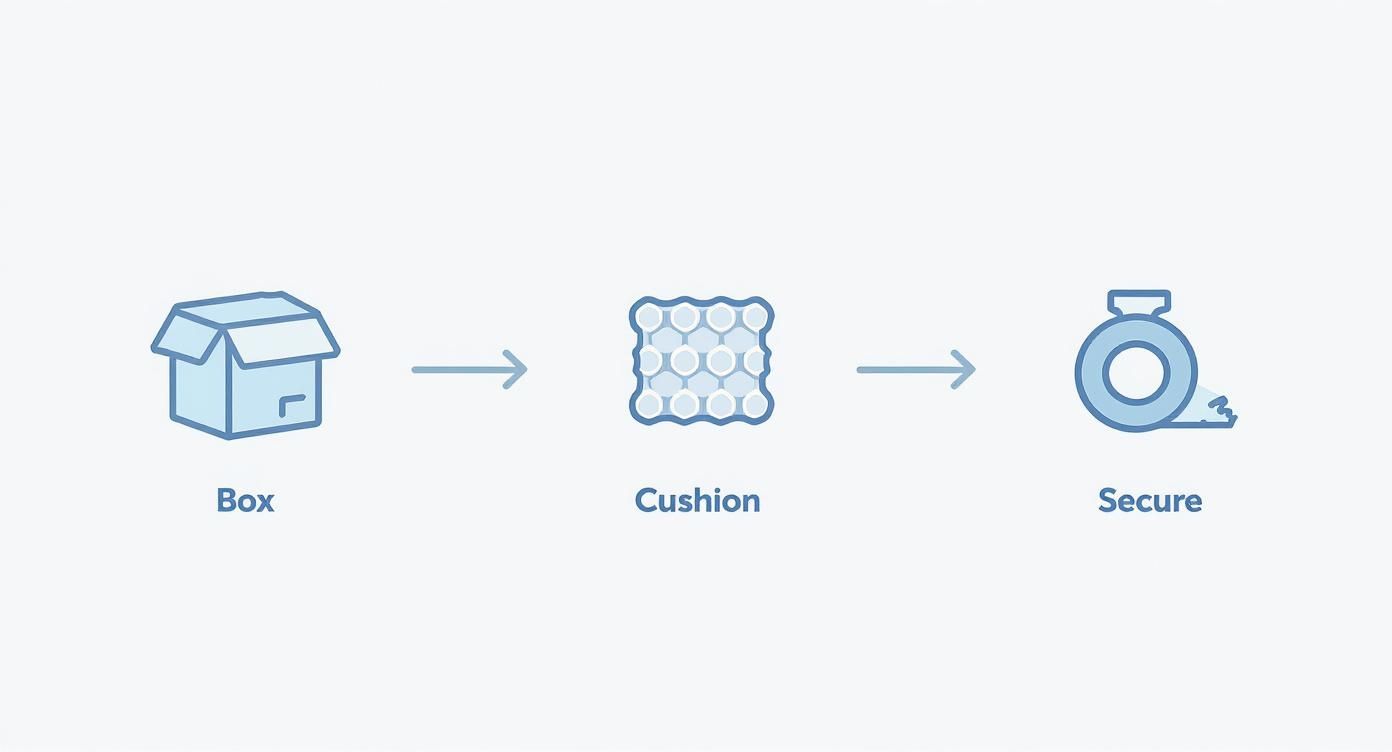
Mastering Wrapping and Cushioning Techniques
With your packing station prepped and the right materials at hand, it’s time for the most important part: protecting your frames. How you wrap and cushion them is what stands between your cherished memories and the inevitable knocks and bumps of a move.
Proper wrapping isn’t just about covering an item up. It’s a deliberate process designed to absorb shock and fend off damage.
First things first, let's deal with the glass. It's the most fragile part of any frame. A simple but incredibly effective trick I've used for years is the 'X-marks-the-spot' method.
Grab your packing tape and run a large 'X' across the glass, from one corner to the other. If you're working with a bigger piece, add a few more lines to create a starburst pattern. This won't magically stop the glass from breaking under heavy impact, but it's a game-changer because it holds the shards in place, preventing them from scattering and shredding your artwork or photograph.
The Art of the Perfect Wrap
Once the glass is taped, you need to build a protective cocoon around the entire frame. The idea is to create a soft buffer that shields everything, the glass, the corners, and any ornate edges from pressure and impact. This is where your good-quality bubble wrap really shines.
- Lay It Flat: Place your frame face down on a big sheet of bubble wrap. You'll want enough to cover the whole thing at least twice over.
- Wrap It Like a Present: Fold the long sides of the bubble wrap over the back, then fold the top and bottom ends over. Secure everything with packing tape. The trick is to get it snug, but not too tight. If you pull the wrap too tight, you can actually create pressure points on the frame itself.
- Secure Thoroughly: Don't be shy with the tape. A few solid strips will make sure the bubble wrap stays put during the entire journey.
The whole process is about creating layers of protection: choosing the right box, applying plenty of cushioning, and securing it all tightly.
As you can see, each step builds on the last, creating a robust protective system for your valuables.
Protecting the Most Vulnerable Points
Frame corners are almost always the first casualty in a move. One accidental drop can easily lead to a chipped, dented or completely shattered corner, ruining an otherwise perfect piece. This is precisely why foam corners are a non-negotiable part of my packing kit.
Simply slide a foam corner protector over each of the four corners before you even start with the bubble wrap. They're designed to take the initial shock from an impact, spreading the force away from the frame's delicate joints. You can learn more about how these simple bits of foam offer maximum safety in our complete guide to using foam corner guards.
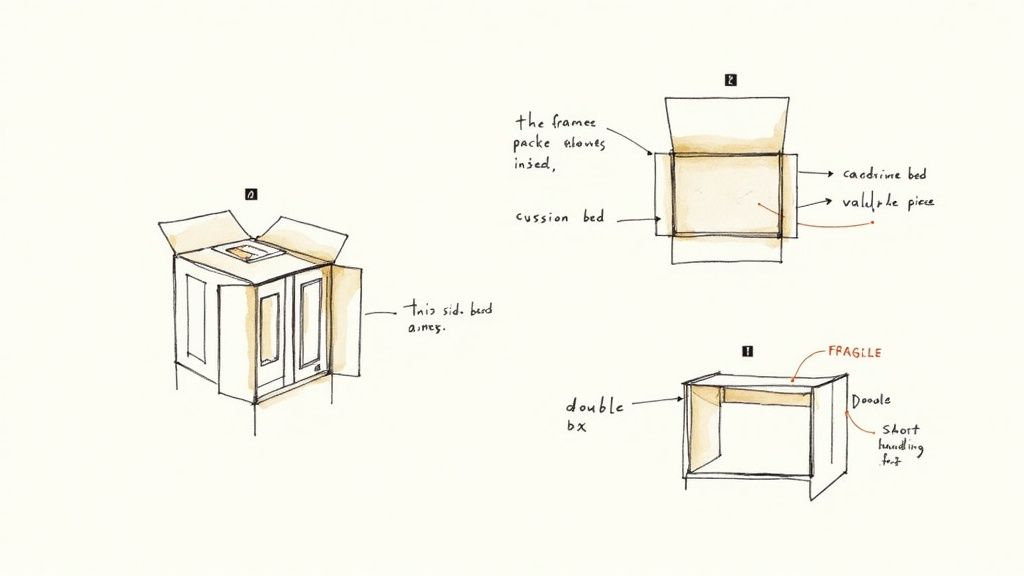
The Professional's Secret: The Cardboard Sandwich
For those really valuable, large, or extra-fragile frames, you'll want to add another layer of rigid protection. The pros use a technique called the 'cardboard sandwich' and it’s surprisingly easy to replicate at home.
Expert Tip: The cardboard sandwich provides a crucial puncture-proof shield. It stops sharp objects from poking through the bubble wrap and hitting the glass or artwork in transit. It’s gallery-level protection with basic materials.
Just cut two pieces of strong cardboard from a spare box, making them slightly larger than the frame. Place one piece on the front and one on the back, creating a sandwich with your frame nestled inside. Tape the cardboard pieces together securely around all the edges.
Now, you can wrap this entire cardboard-protected package in bubble wrap. This technique adds incredible structural integrity and is the best way to make sure your most prized pieces arrive in pristine condition. With that final layer, you've got all the essentials covered.
Smart Boxing and Labelling Strategies
You’ve done all the hard work wrapping and cushioning your frames, but the final, crucial shield is the box itself. It’s what stands between your artwork and the bumps, drops and crushing forces of a move. Getting this part right is every bit as important as the wrapping.
The key is to pick a box that’s just a little bit bigger than your wrapped frame. If there’s too much empty space, the frame will just slide around, making all your careful padding useless. Go too tight, though and you create pressure points that can easily lead to a cracked frame or dented corner.
Before you put anything inside, always create a soft landing pad at the bottom. A good layer of scrunched-up packing paper or even a folded removal blanket will give you that first line of defence against any shocks.
Getting the Placement Just Right
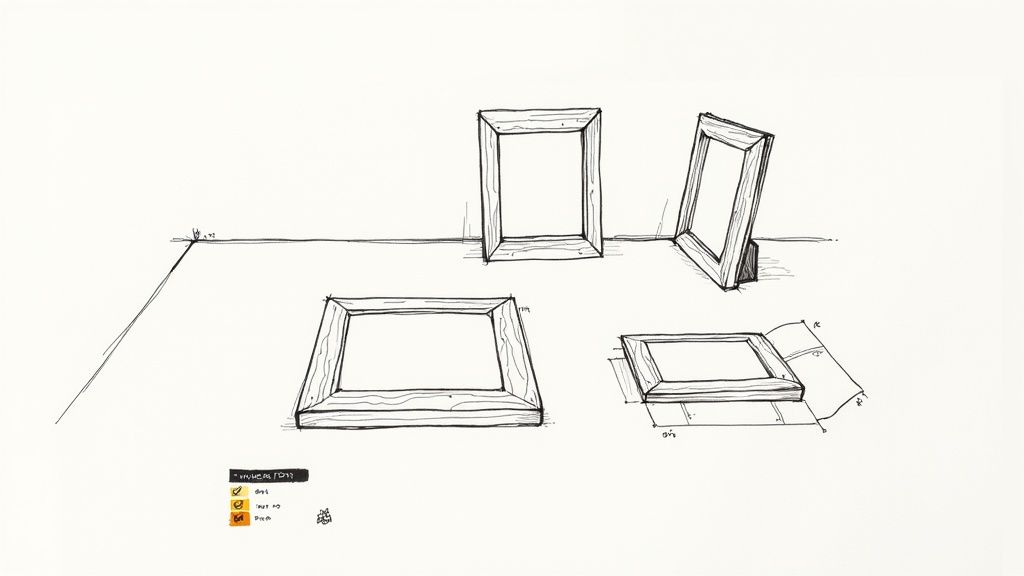
How you position the frames inside the box can make or break them, literally. Always, always pack your frames vertically, like you’re filing records in a crate. Never lay them flat. A flat frame has to bear the full weight of anything stacked on top, putting immense pressure on the glass and the corner joints.
When you’re putting multiple frames in one box a few simple rules apply:
- Make sure every single frame is wrapped individually first.
- Stand them on their longest edge, which gives them the most stability.
- Slip pieces of cardboard between each frame to stop them from rubbing or knocking against each other.
This vertical method spreads out any weight and dramatically cuts down the risk of damage. It’s a professional technique that’s surprisingly easy to do yourself. You can find plenty of sturdy, double-wall cardboard boxes that are absolutely perfect for this.
The Double-Boxing Trick for Your Most Prized Pieces
For those truly irreplaceable or valuable pieces, take a cue from art galleries and professional handlers: use the double-boxing method, it’s simple. You pack your frame in its primary, well-padded box and then you place that box inside a second, slightly larger one. Fill all the gaps between the two boxes with cushioning like packing peanuts or more bunched-up paper.
What you’ve created is a "box-within-a-box" system that offers unmatched shock absorption. Any knock from the outside is taken by the outer box and its padding, leaving your precious frame completely untouched.
This isn’t just for museum pieces. The UK is a huge part of Europe’s online framing market, which handles about 30 million orders every year. With around 35% of UK orders now including premium museum-quality glass, that extra layer of protection is more important than ever.
Make Your Labels Clear and Unmistakable
Finally, don’t neglect the labels. This is how you communicate with your movers. Vague instructions are a recipe for disaster.
Key Takeaway: Just scrawling 'FRAGILE' on the side is not enough. Your labels need to be specific and give clear instructions to anyone who has to lift that box.
Grab a thick marker and write clearly on at least two sides of the box. Be specific:
- FRAGILE - PICTURE FRAMES
- THIS WAY UP (with big, obvious arrows: ↑)
- DO NOT LAY FLAT
- DO NOT STACK
This kind of detail leaves no room for error. It tells the handlers exactly how the box needs to be carried and stored, ensuring your carefully packed frames get the respect they deserve all the way to their new home.
Shipping Your Frames and Greener Packing Choices
Once you’ve got your frames all wrapped up and safely boxed, sending them on their way involves a bit more than a quick trip to the post office. Getting to grips with the right courier and understanding the small print on shipping insurance is absolutely vital, especially if you’re dealing with valuable artwork or photos you can’t replace.
Different couriers have different reputations for handling fragile goods, so it's worth doing your homework. Compare their services and, most importantly, their insurance policies. Always declare the real value of what you’re sending. Trying to save a few quid by under-declaring can backfire badly if something goes wrong, leaving you out of pocket. Proper insurance gives you the peace of mind that you’re covered for the full replacement cost.
Making a More Eco-Conscious Choice
We’re all becoming more aware of our environmental impact, and that’s changing the way we pack. In fact, the UK picture frames market, valued at around USD 484.57 million in 2024, is seeing a huge shift towards greener materials as people demand more sustainable options.
The good news is that going green doesn’t mean compromising on protection. There are some brilliant alternatives to traditional plastics that will keep your frames just as safe while being much kinder to the planet.
A Greener Move: Choosing sustainable materials is a simple but powerful way to cut down on the waste that comes with moving house. Small changes, like switching to biodegradable bubble wrap or reusing old boxes, all add up to make a real difference.
Fantastic Sustainable Packing Materials to Try
Making your move more eco-friendly is surprisingly easy these days, thanks to a growing range of clever materials designed to protect both your belongings and the environment.
- Biodegradable Bubble Wrap: You get all the same fantastic cushioning you'd expect from standard bubble wrap, but this version is designed to break down much, much faster in landfill. That means less long-term plastic pollution.
- Corrugated Paper Wrap: This is a brilliant, recyclable alternative to plastic bubble wrap. It provides a strong, cushioned layer that’s perfect for wrapping around frames and absorbing knocks.
- Reused Materials: Never underestimate the power of what you already have! Clean, sturdy boxes from a previous move or a friendly local shop work just as well as new ones. Removal blankets are another great reusable option for padding out larger items.
By working these options into your packing routine, you can make sure your frames are both secure and packed responsibly. For even more ideas on cutting down waste, have a look at our guide to making an eco-friendly move.
Even with the best packing plan, some pieces just make you stop and think. From oversized canvases to fiddly ornate frames, here are our answers to the questions we get asked the most.
How Should I Pack a Very Large Piece of Framed Art?
When you’re dealing with a really big piece of art, a standard box just isn’t going to work. You’ll need a specialty mirror or art box designed for the job.
First things first, use that ‘cardboard sandwich’ technique we talked about to create a solid shield for the front and back. Then wrap the entire thing in at least two layers of large-bubble bubblewrap and, crucially, add some sturdy foam corner protectors. For something truly valuable or sentimental, I’d always recommend double-boxing.
Finally, get that marker pen out and label the box clearly: 'OVERSIZED FRAGILE ART'. Make sure the movers know to load it securely on the van where it can’t be crushed or have anything fall on it.
What Is the Best Way to Protect Frames with Ornate Carvings?
Ornate frames look beautiful but are notoriously fragile. Those delicate details need a little extra TLC. Start by wrapping the entire frame in a layer of soft packing paper. This is a vital first step, as it stops the bubble wrap from snagging on any carvings or leaving behind those annoying imprints.
Next, use multiple layers of bubble wrap, taking the time to gently press it into the nooks and crannies to support the detailed work. You can even build up extra padding around the most delicate spots using wadded paper before you add the final layer of bubble wrap.
Crucial Tip: Always give an ornate frame its own box. Don't be tempted to squeeze anything else in with it. Pressure from other items is the number one reason detailed woodwork gets damaged during a move. A snug, secure fit is what you’re aiming for.
Can I Pack Multiple Small Frames Together in One Box?
You absolutely can, but you have to do it strategically to avoid breakages. The key is to treat each frame as an individual item first.
Wrap every single small frame properly, just as you would if it were being packed alone. Once they’re all wrapped, stand them up vertically inside a sturdy, double-wall box, think of it like a filing cabinet for pictures. Slide pieces of cardboard or extra bubble wrap or ideally using large bubblewrap bags to separate each frame to act as dividers. This stops them from knocking against each other.
Before you seal the box, fill any empty gaps with cushioning material so nothing can shift an inch in transit.
No matter what you're packing, having the right supplies makes all the difference. From heavy-duty double-wall boxes to essential foam corners, The Box Warehouse has everything you need to protect your cherished memories. Find all your professional-grade packing materials at https://www.theboxwarehouse.co.uk.


